Make.com doesn’t require coding skills; it allows you to build customized integrations in just a few clicks.
With Make, you can connect your chatbot with apps such as Google Calendar, Mailchimp, and Salesforce to automate repetitive tasks. The installation process takes just a few minutes.
However, the destination app is sometimes unavailable in the Make Marketplace, or you want to include more information than the native integration provides. In that case, you can use no-code webhooks to make it work.
Make webhooks support one- and two-way communication. They allow you to send information to your server and return a message to the chat if needed.
If you do not want to return the message to the chat, you can use the no-code Zapier webhooks and Make webhooks.
Zapier only allows for sending information out; you cannot return a message to the chat.
Bot configuration
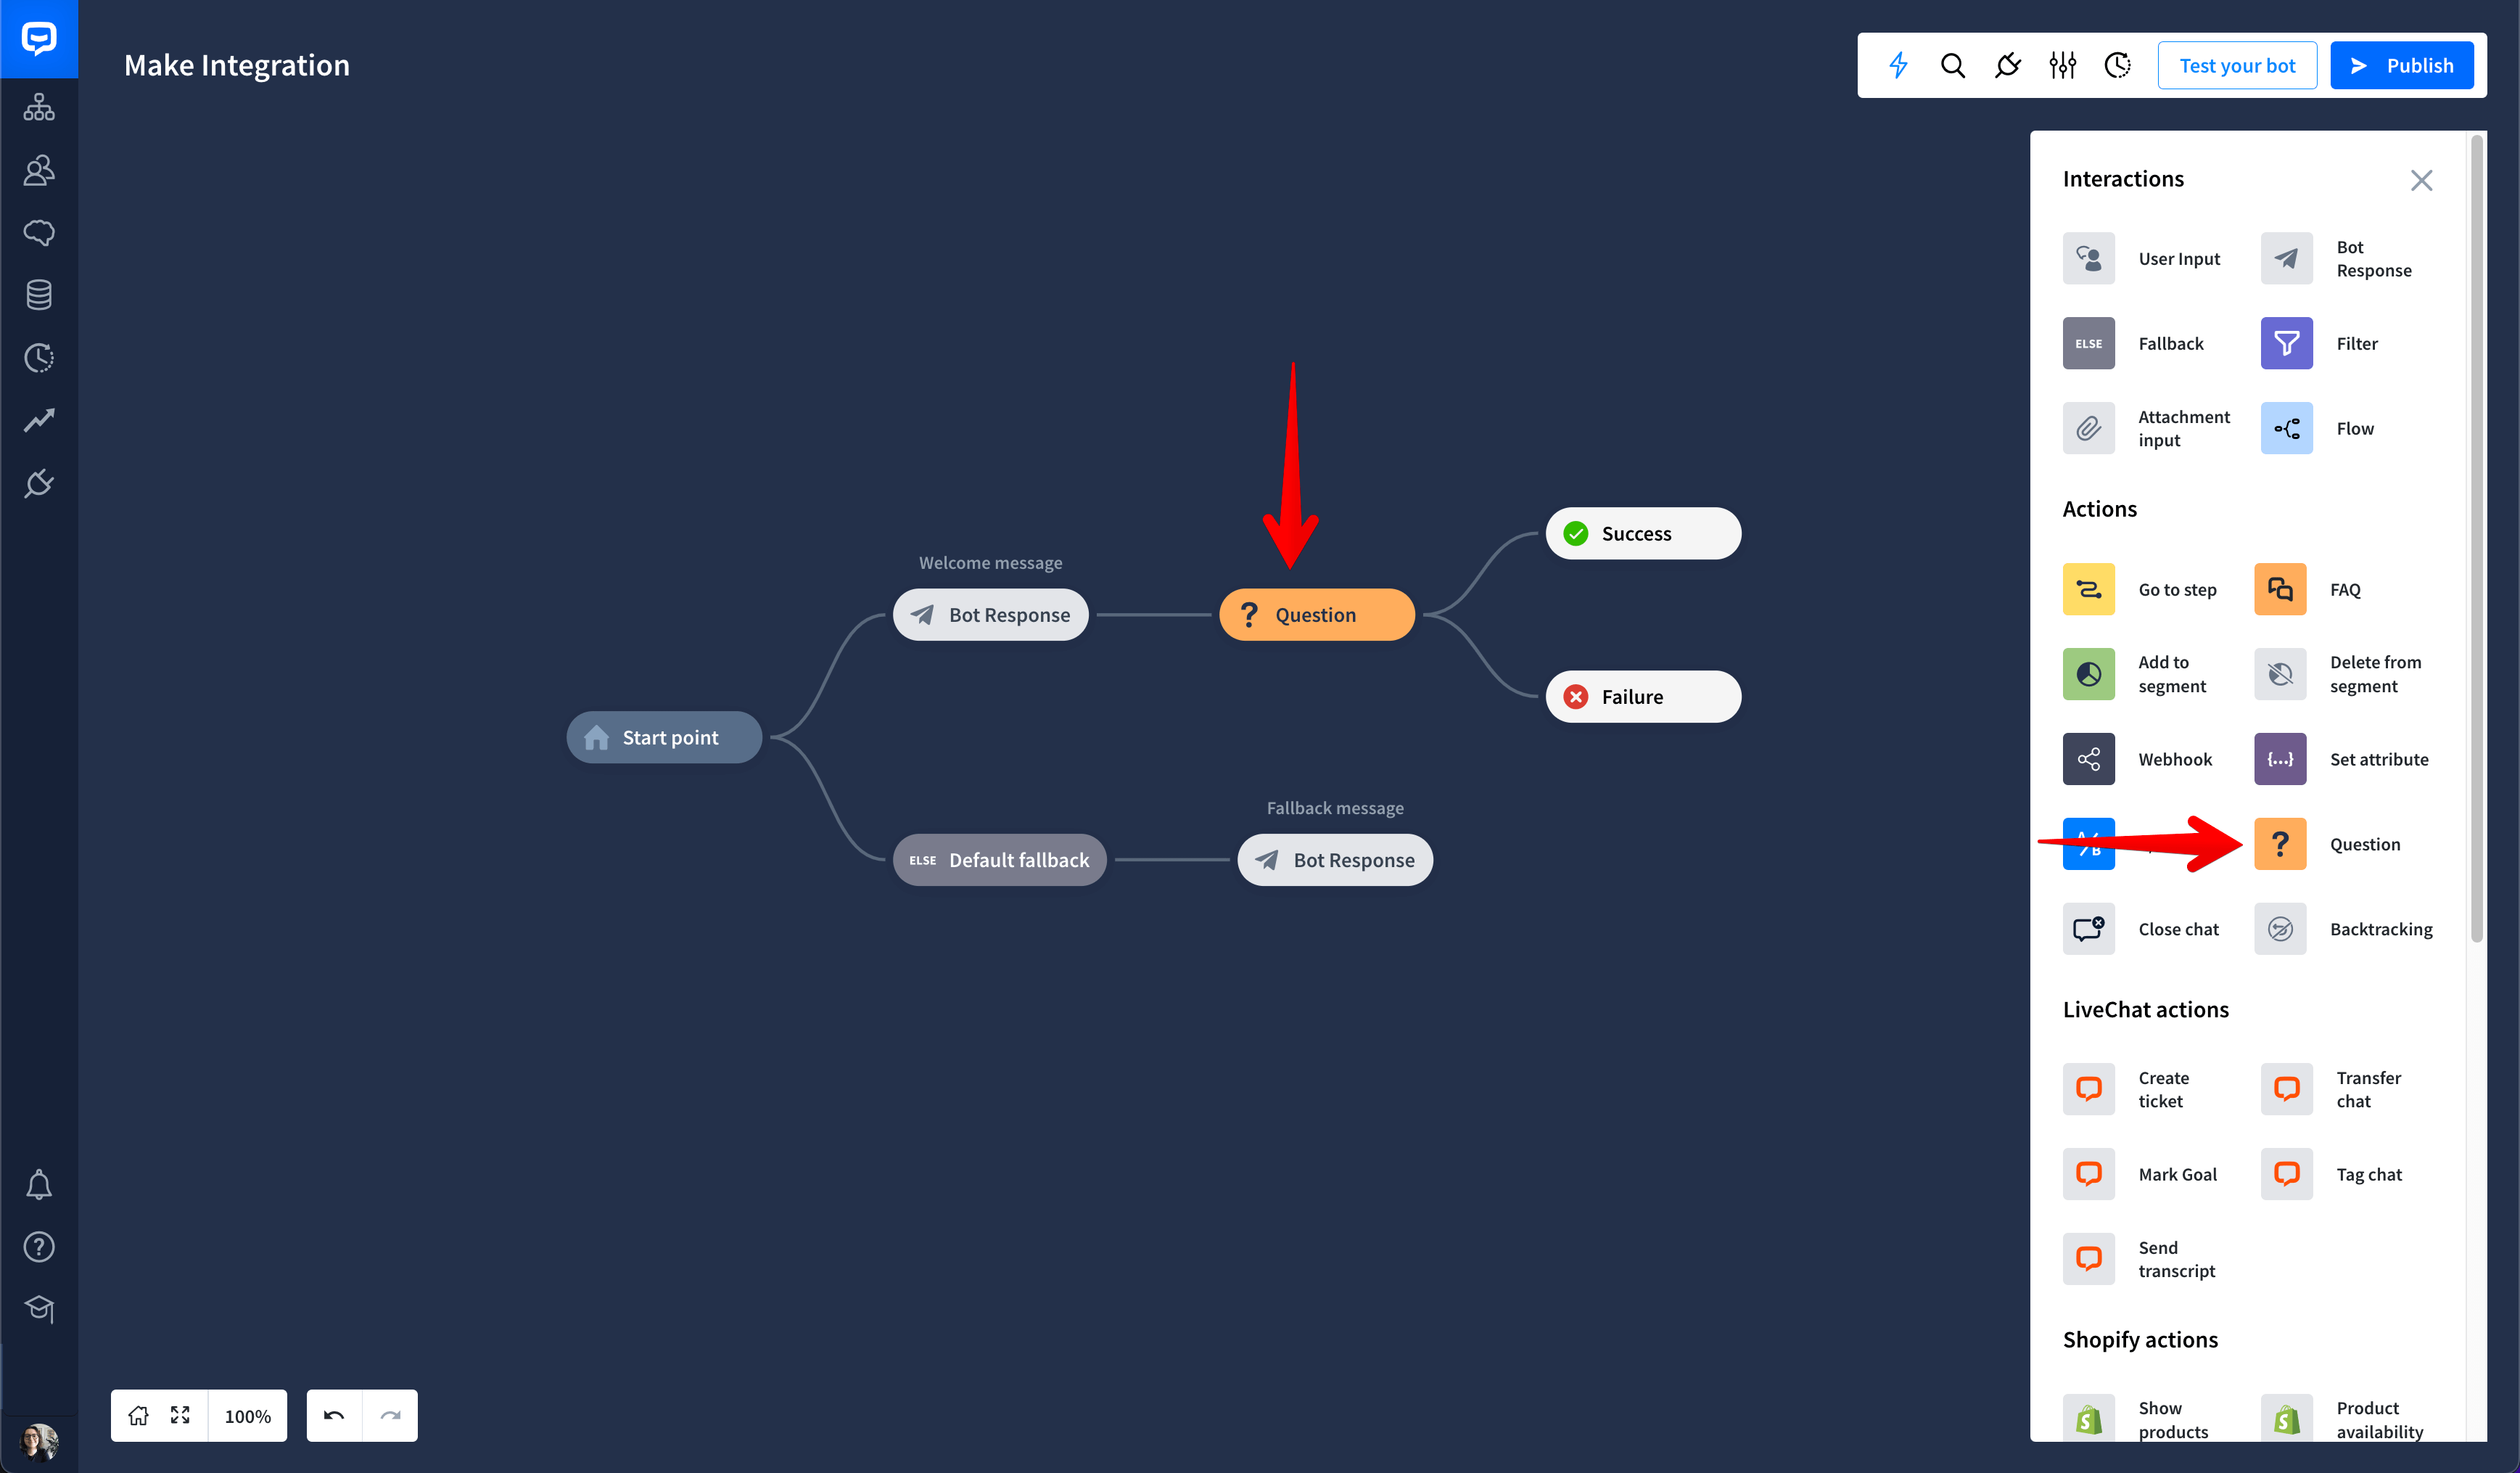
To send the information from the chat to your destination app, you must collect it first. The easiest way to do this is with the Question action.
Add the Question action in the bot and collect all the necessary details. The details will be saved as attributes. Add a Webhook block to initiate the Make webhook after the Success block.
Make Webhook configuration
Make provides all of the resources needed to configure a webhook. But, the configuration happens in both ChatBot and Make products. You must switch between the tabs during the configuration, so keep both tabs open.
-
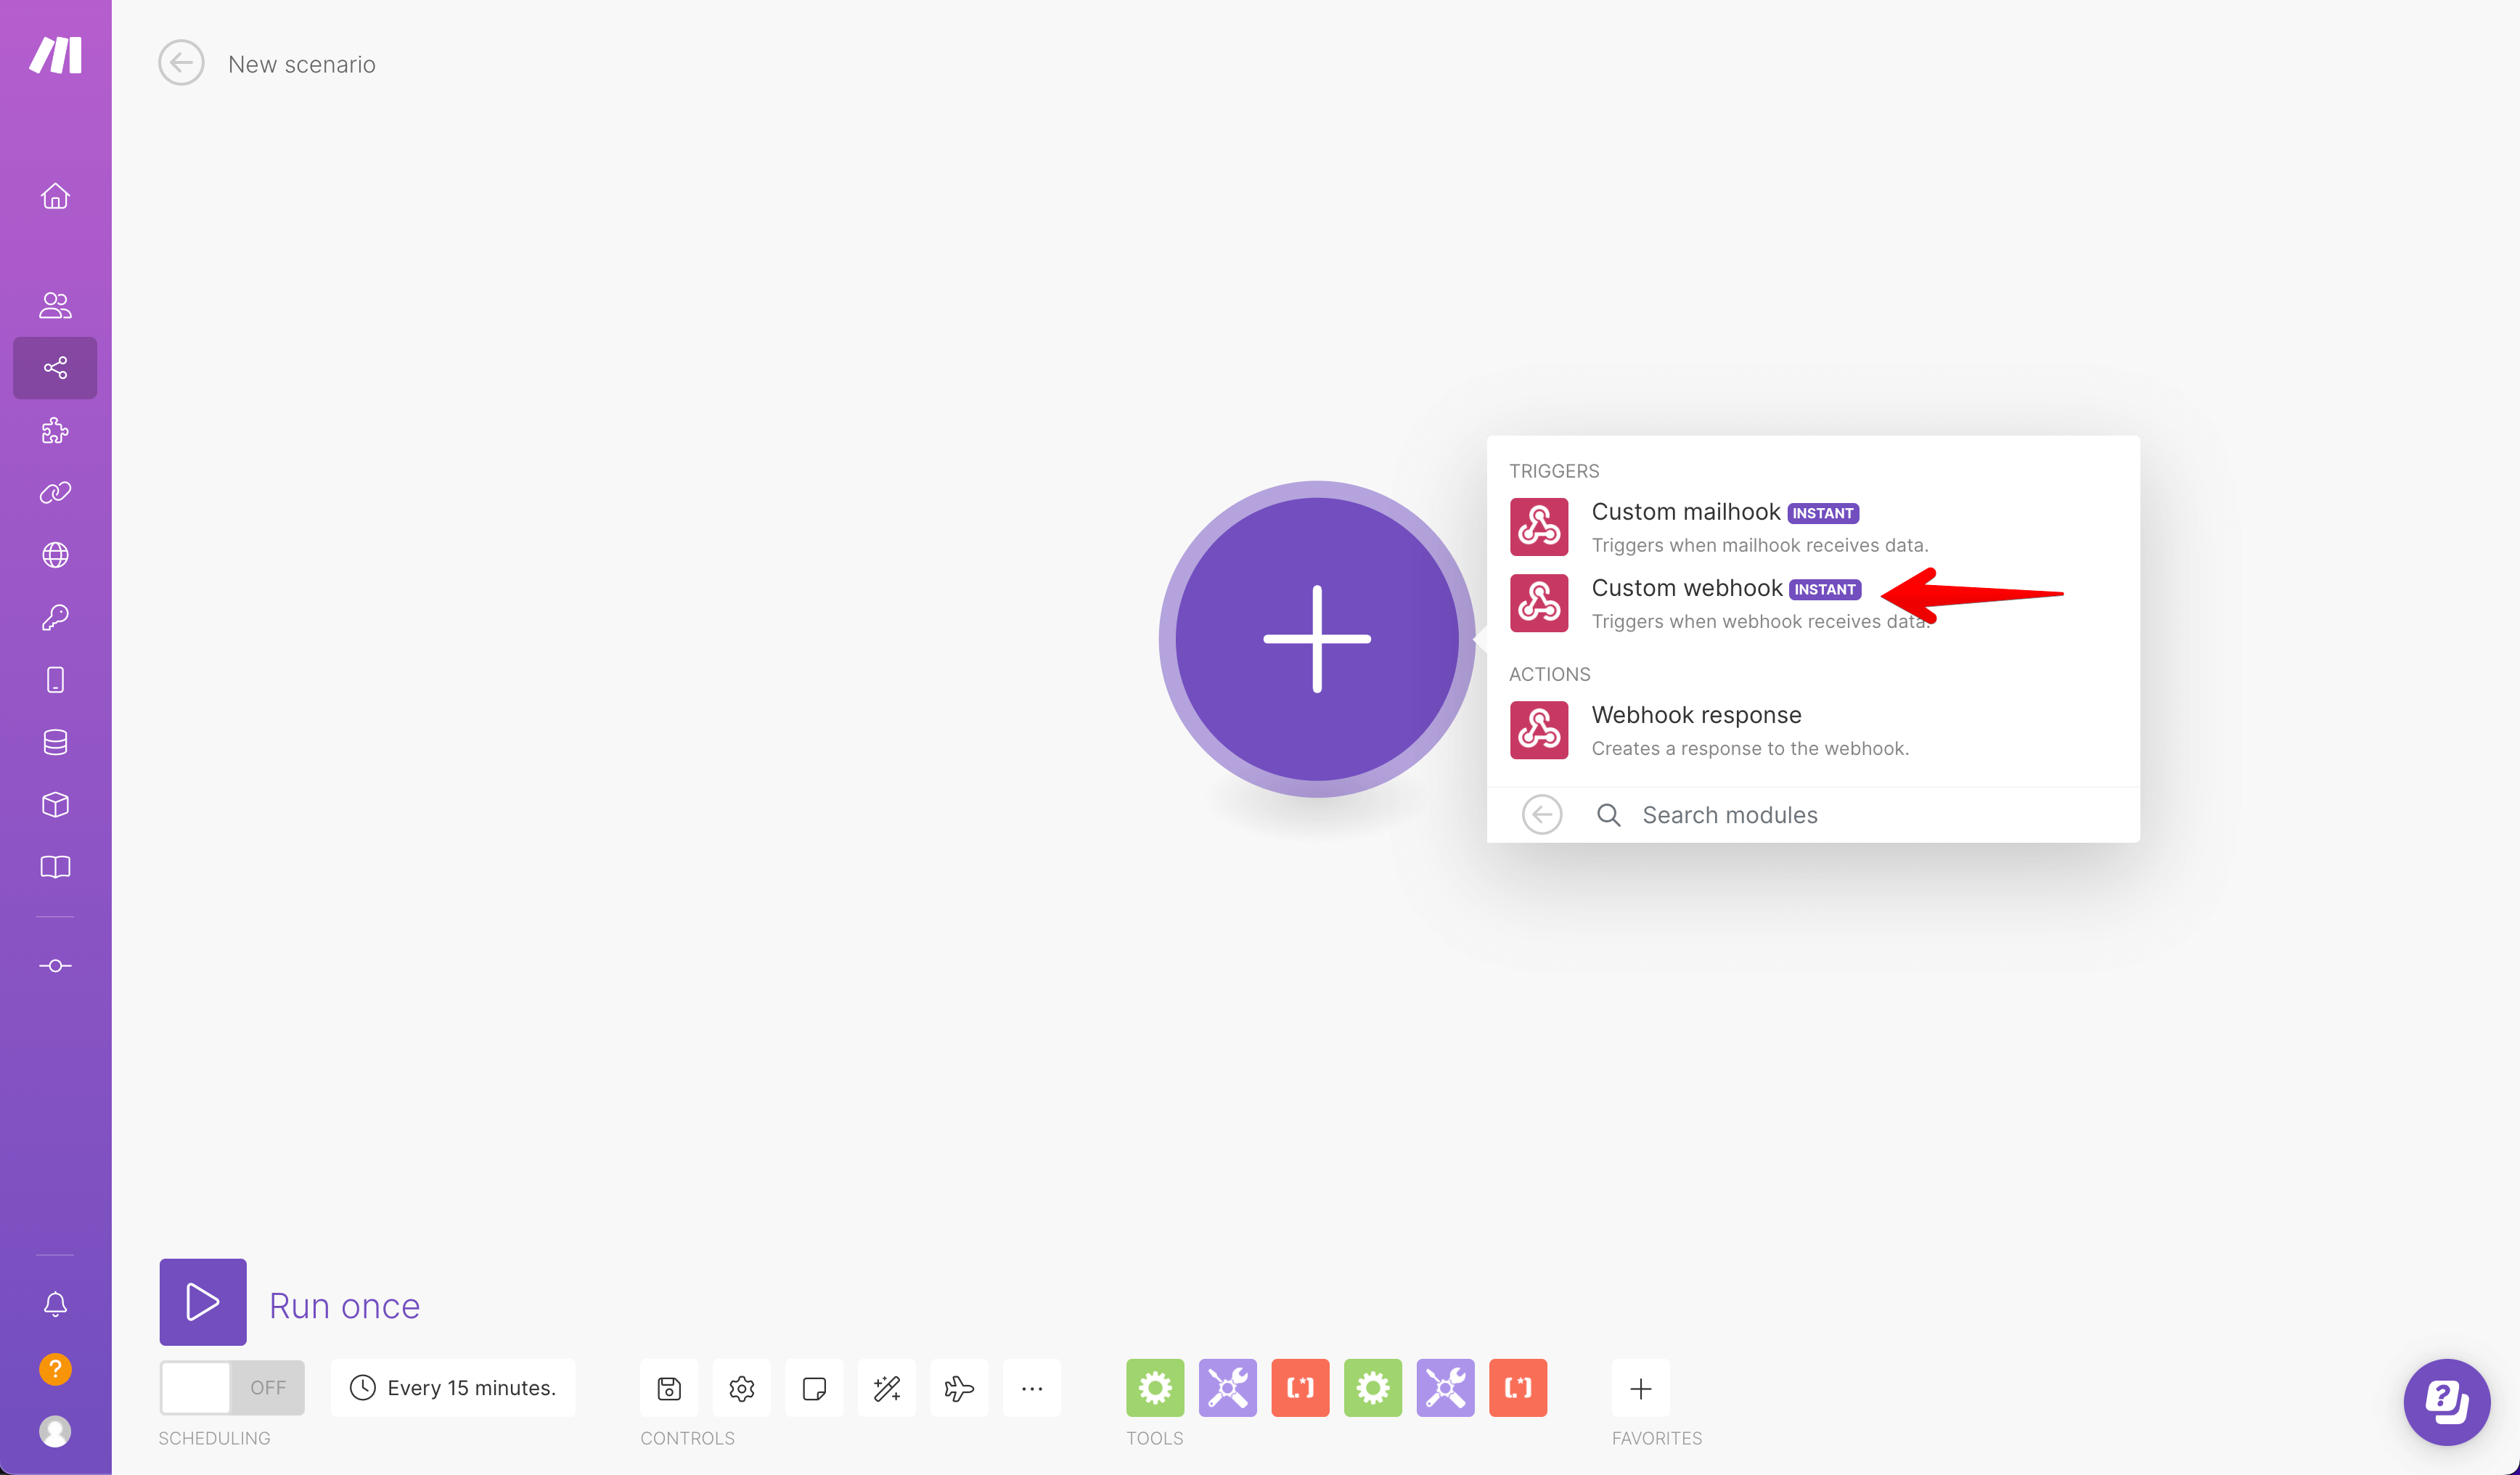
Go to your Make account. Choose the + Create a new scenario button.

-
Use the search tool to select Webhooks from the list. Then, select Custom webhook from the list.
-
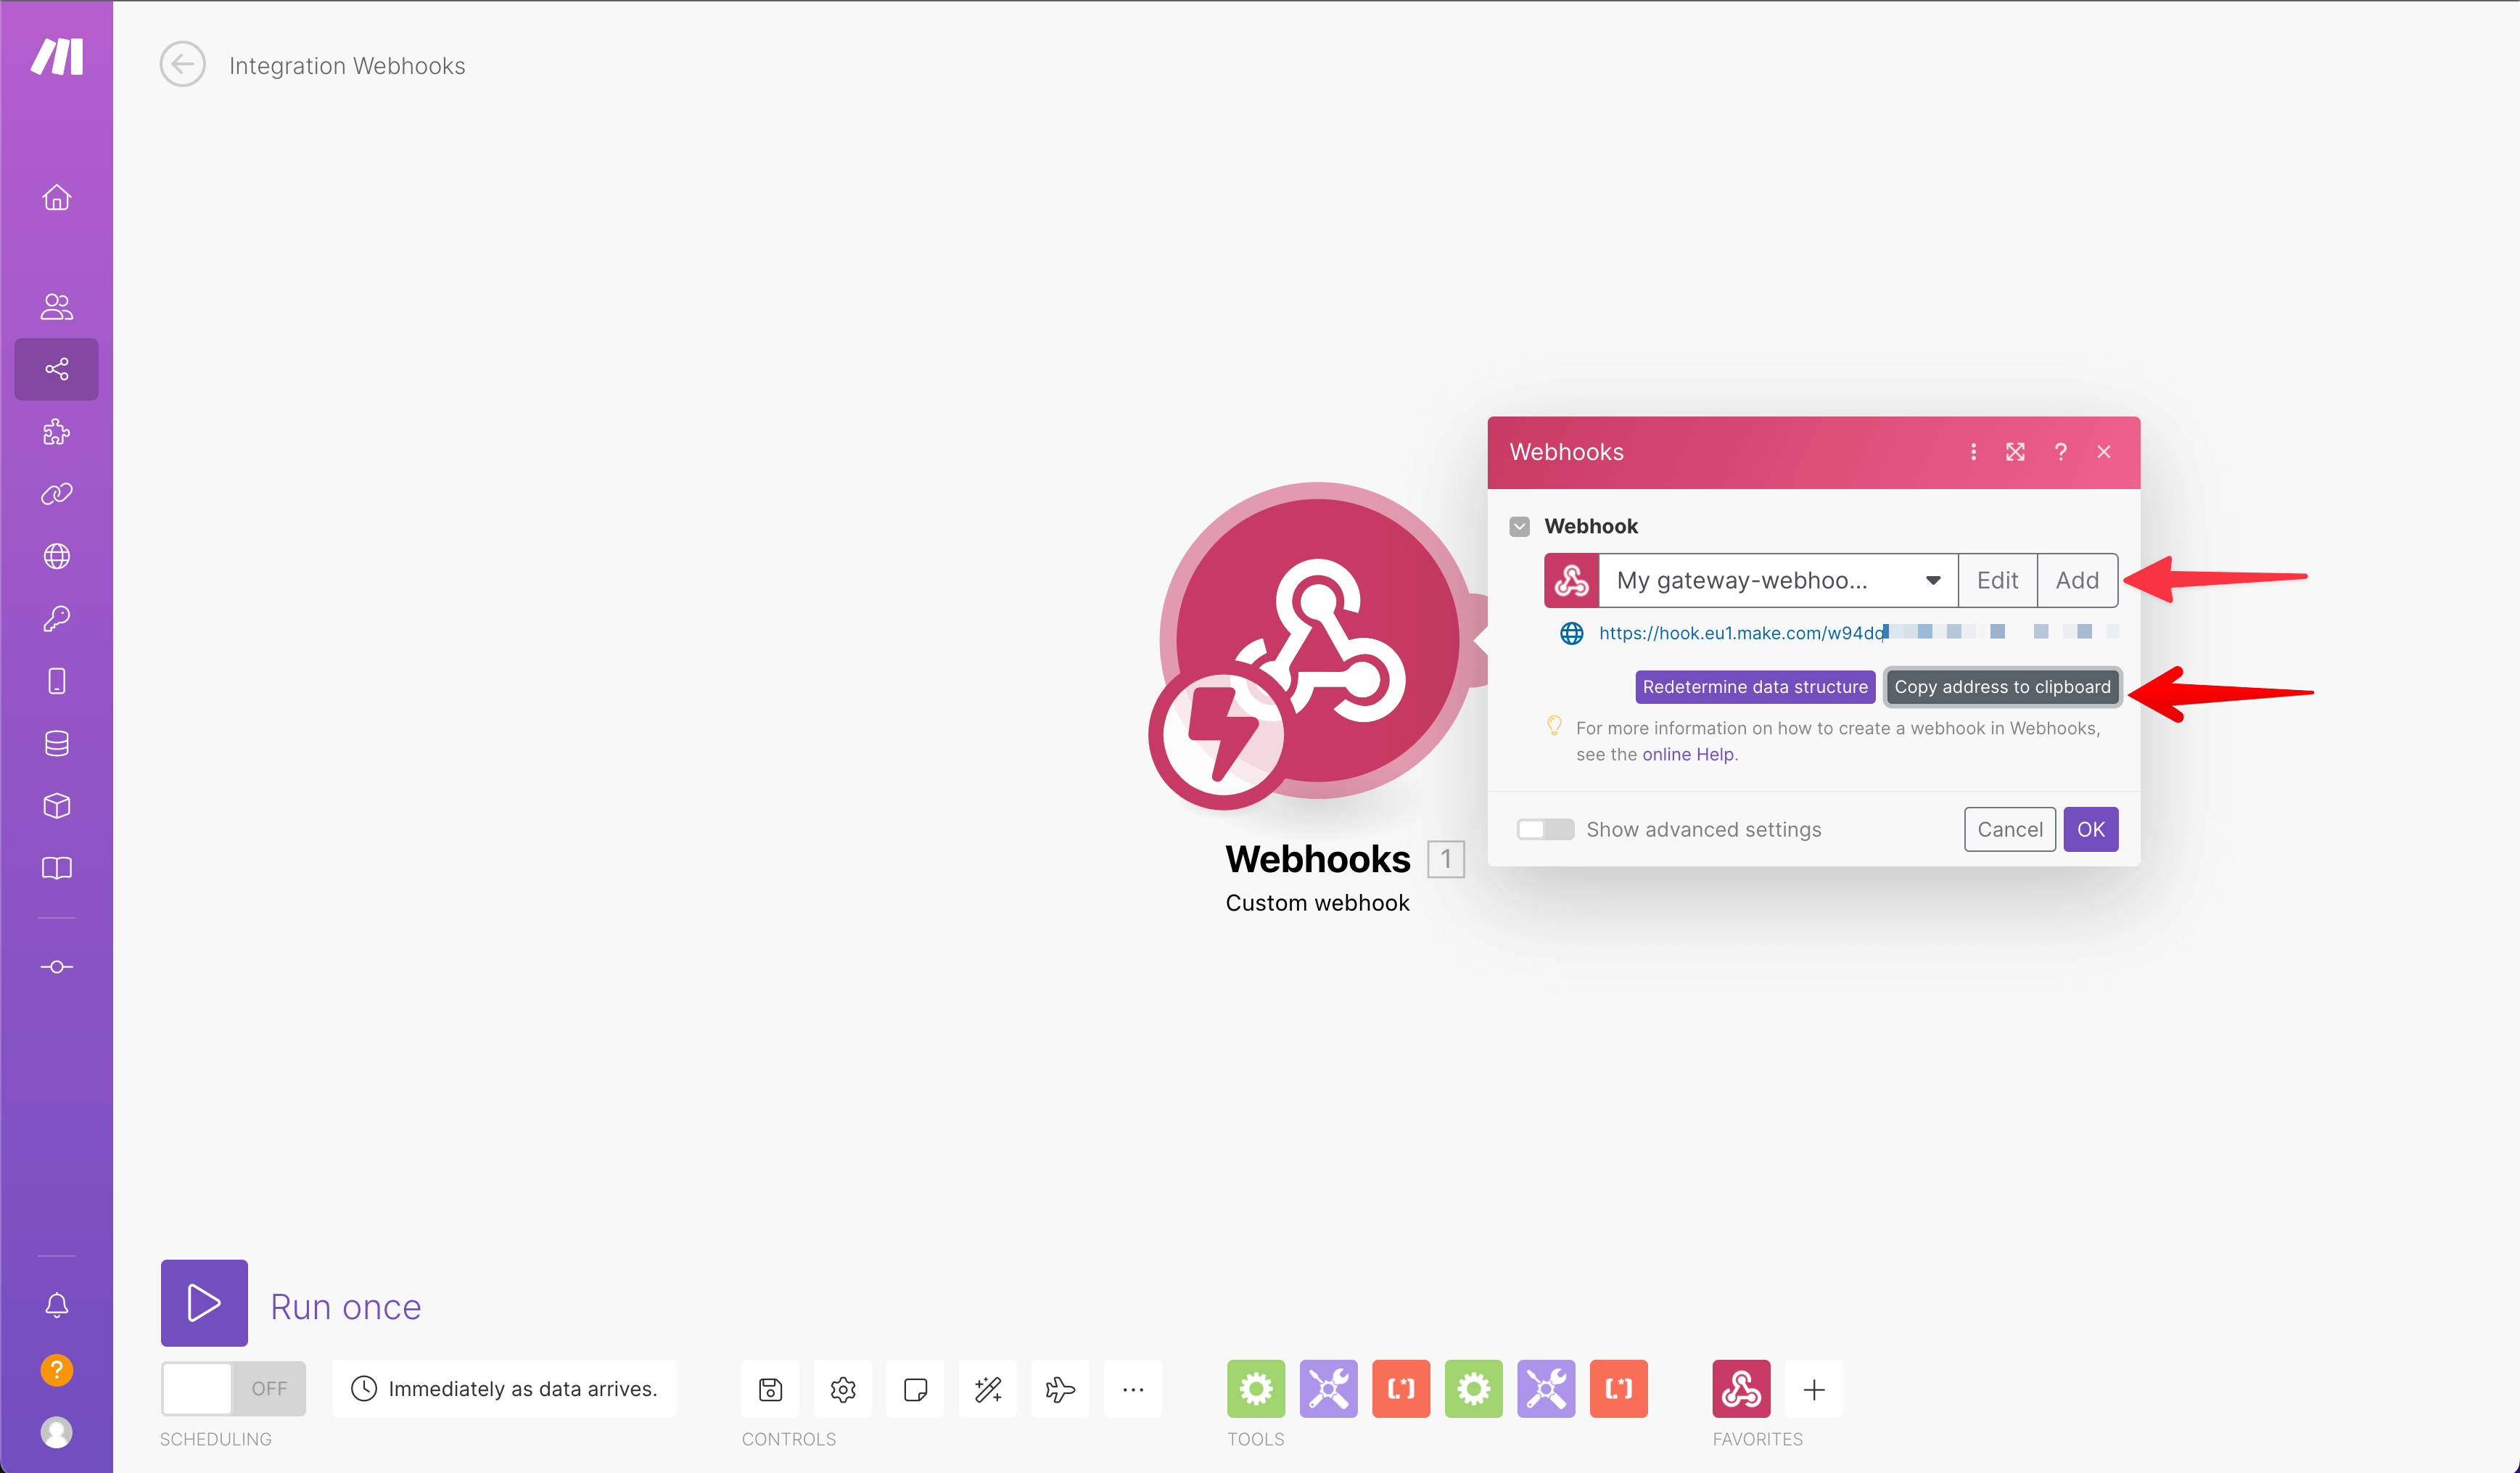
Click Add. Copy the URL address to the clipboard in the next step.
-
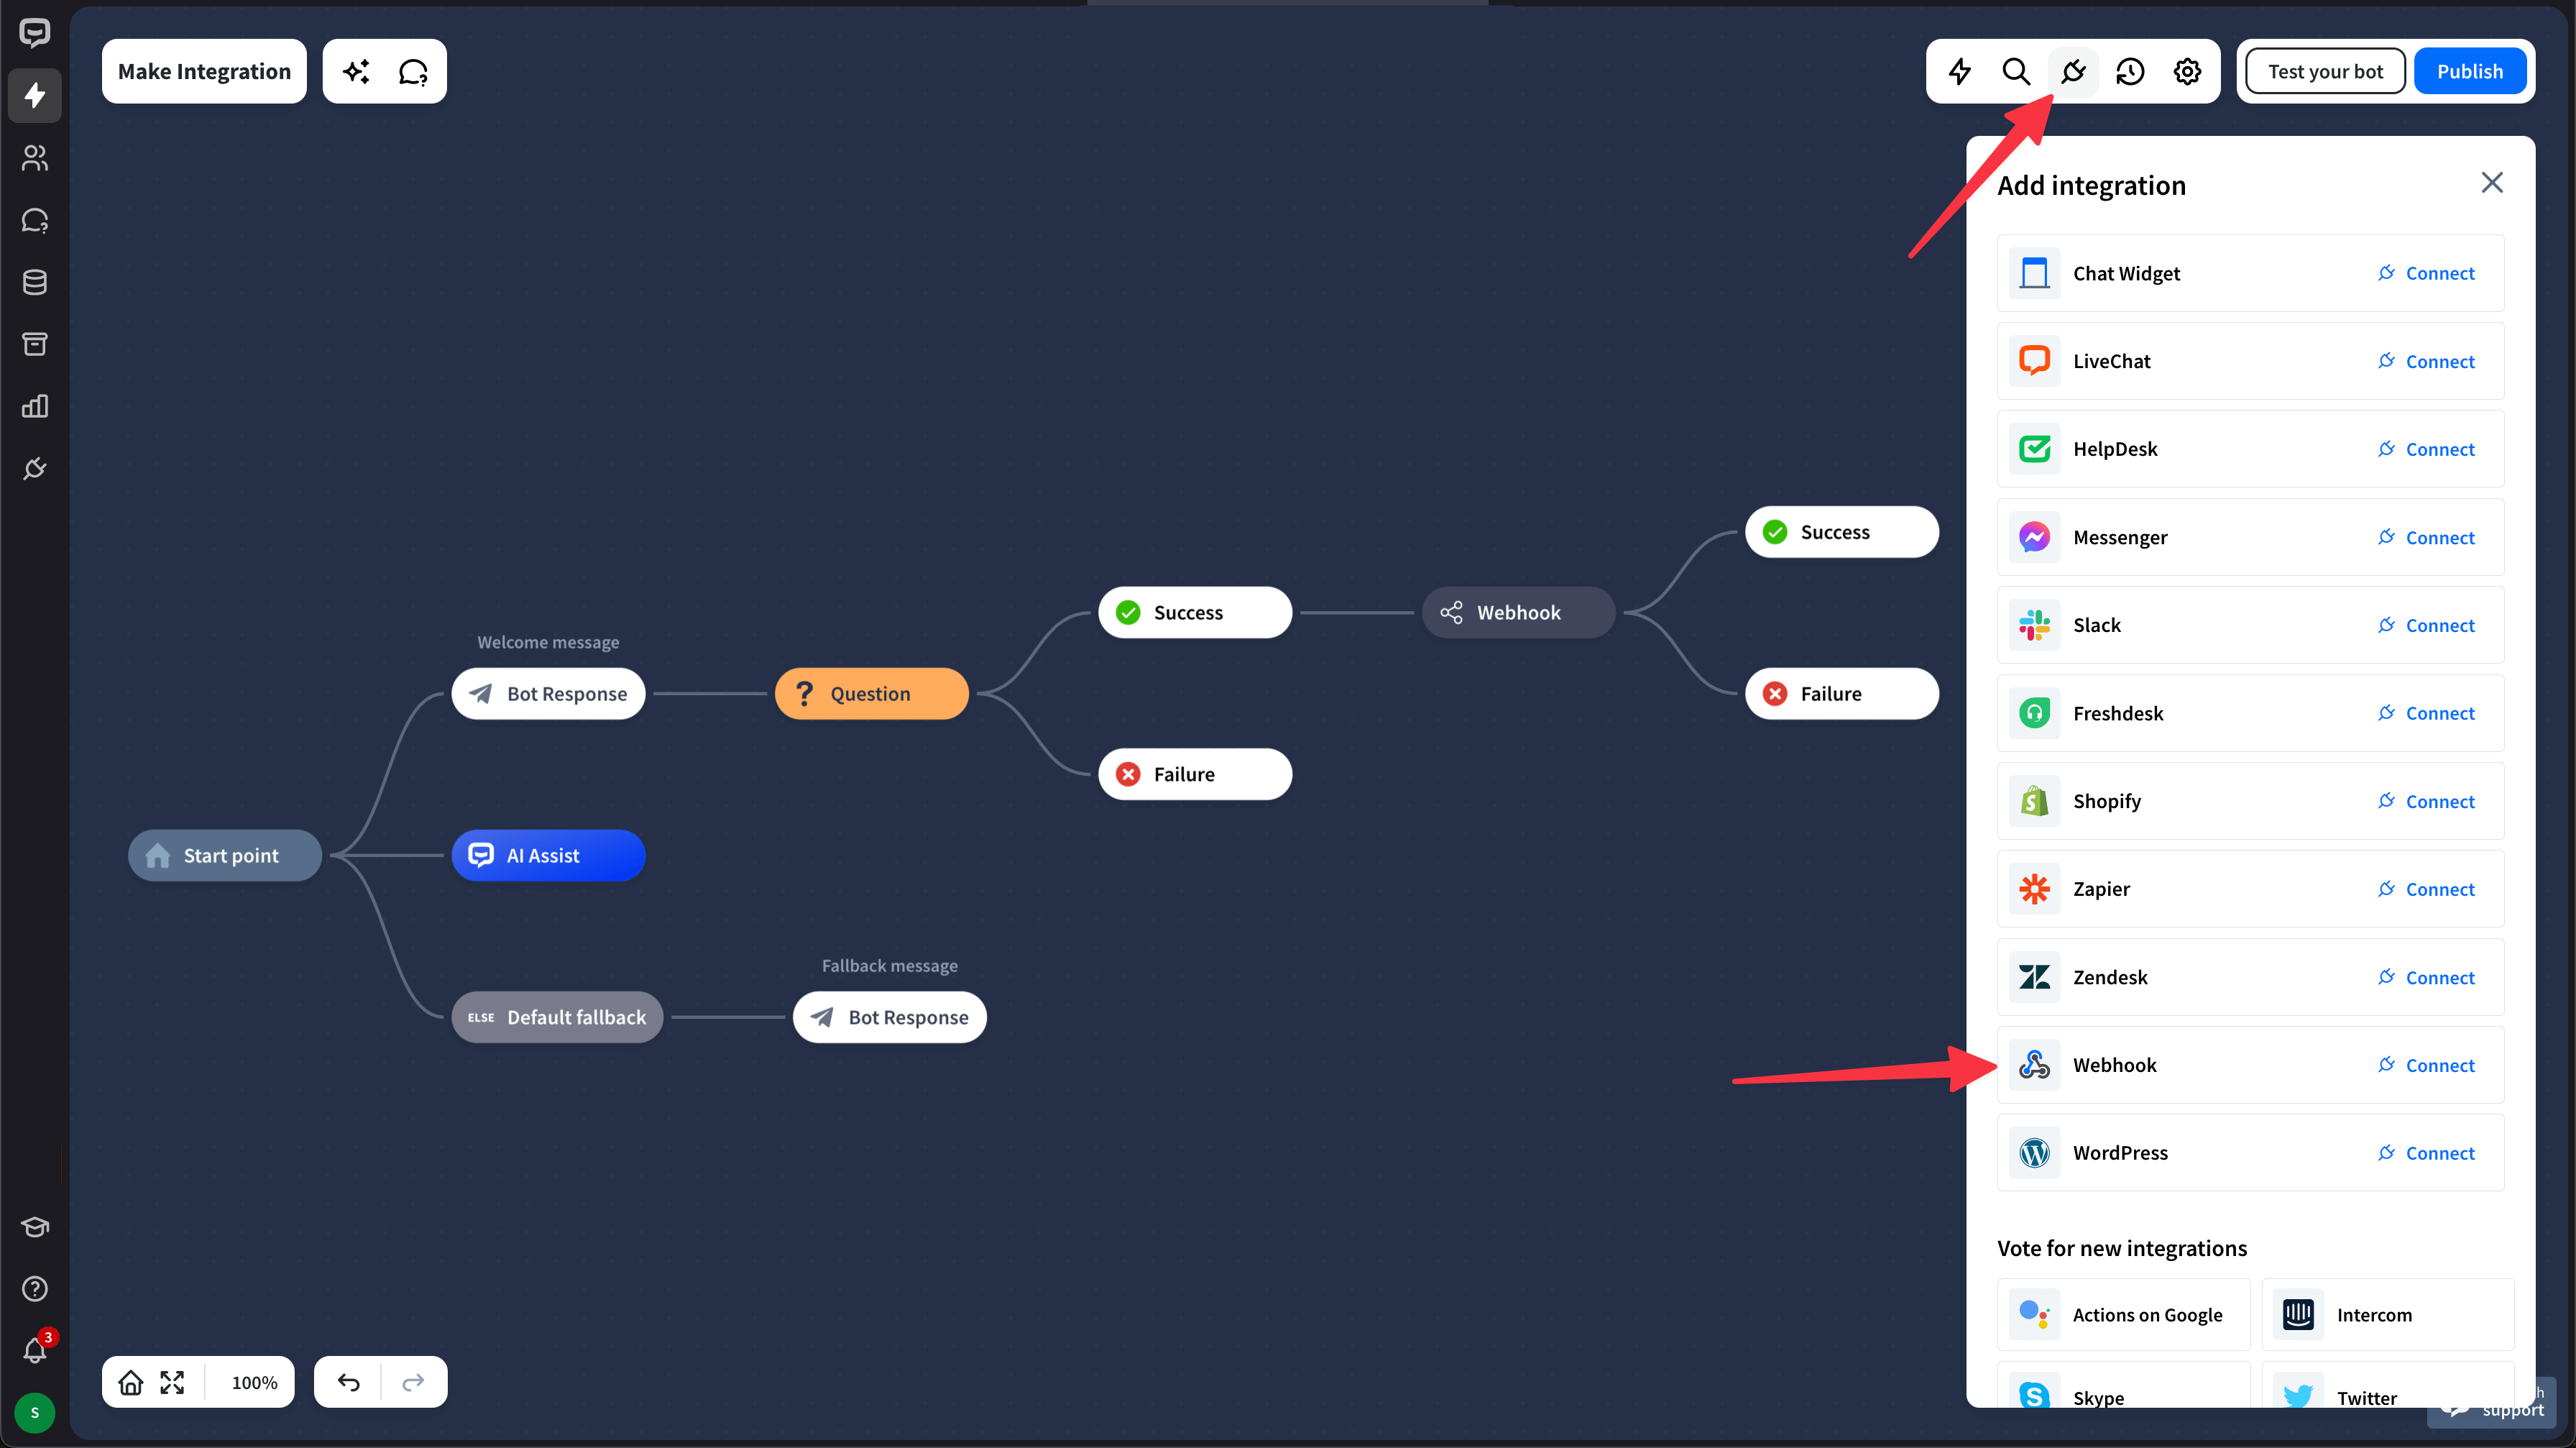
Go back to the bot view. Choose the Integrations icon. Choose Webhook from the list.
-
Paste the copied URL to the Webhook URL field and name the webhook.
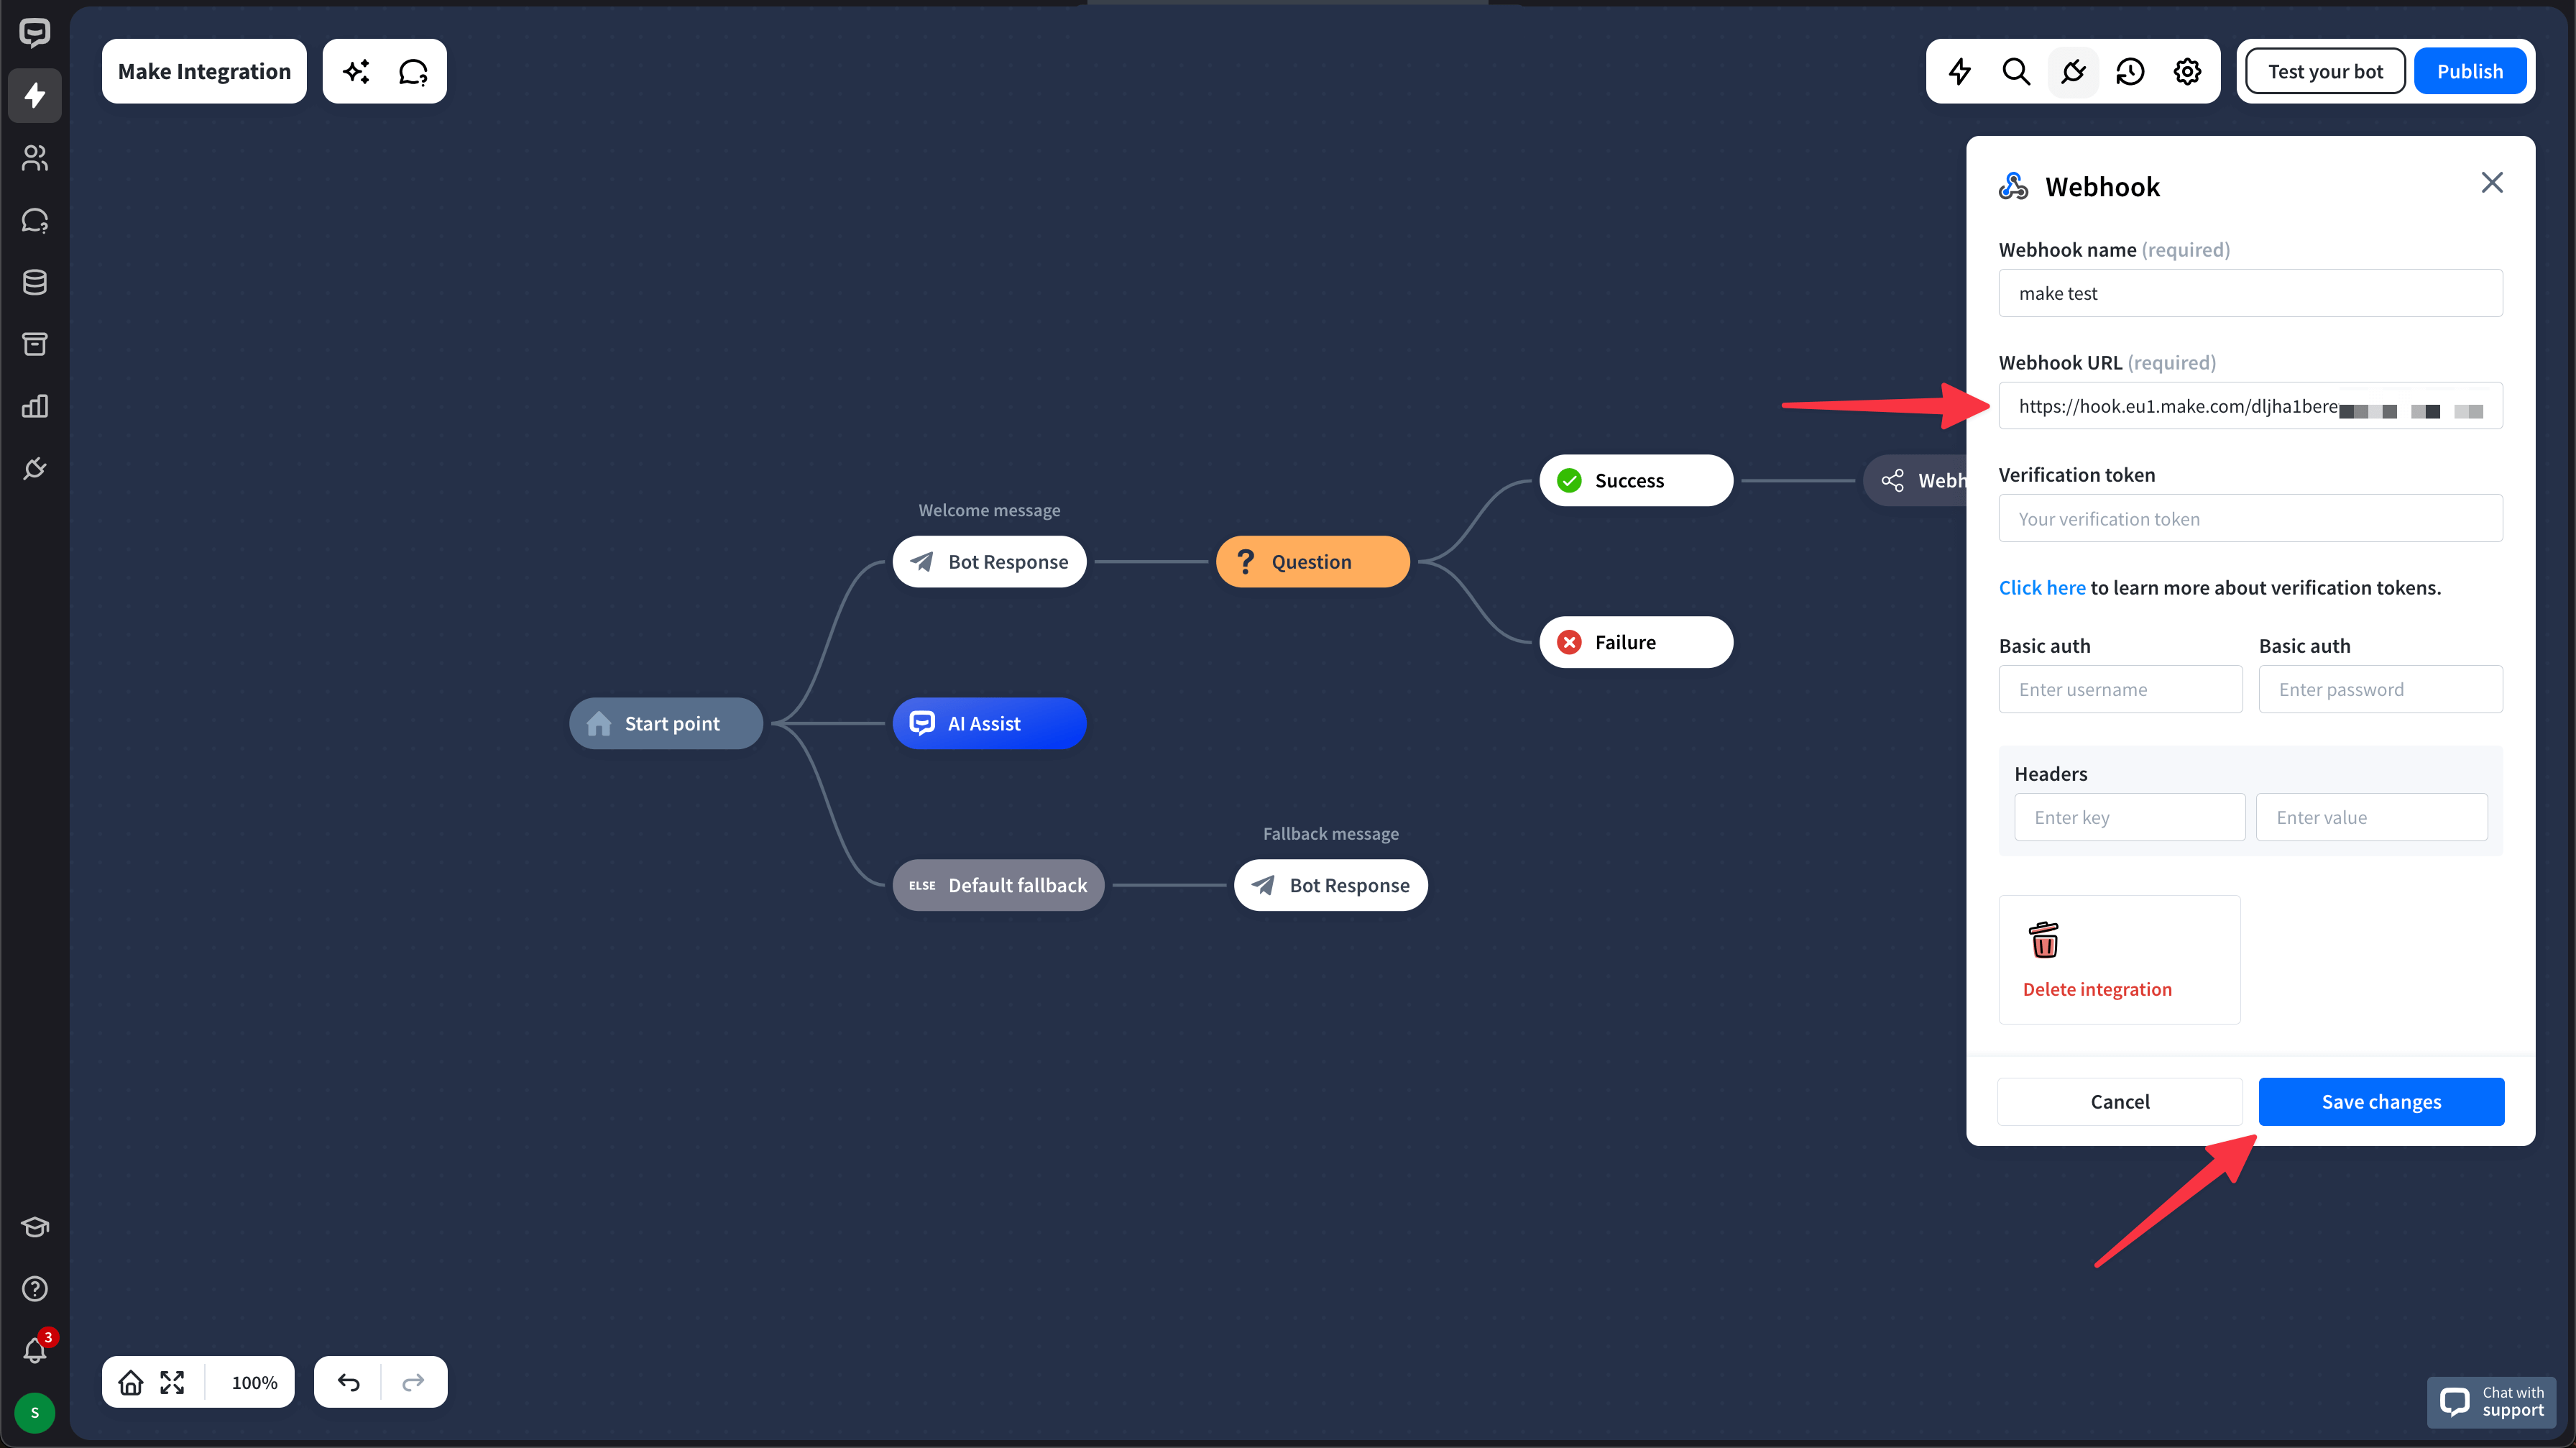
-
Click the Webhook block in the bot. Add the webhook to the block. Go back to Make.
The webhook is added to the block when you see its name on the list under the Selected webhook header. You cannot use the Make webhook if it is not on the list in the Webhook block.
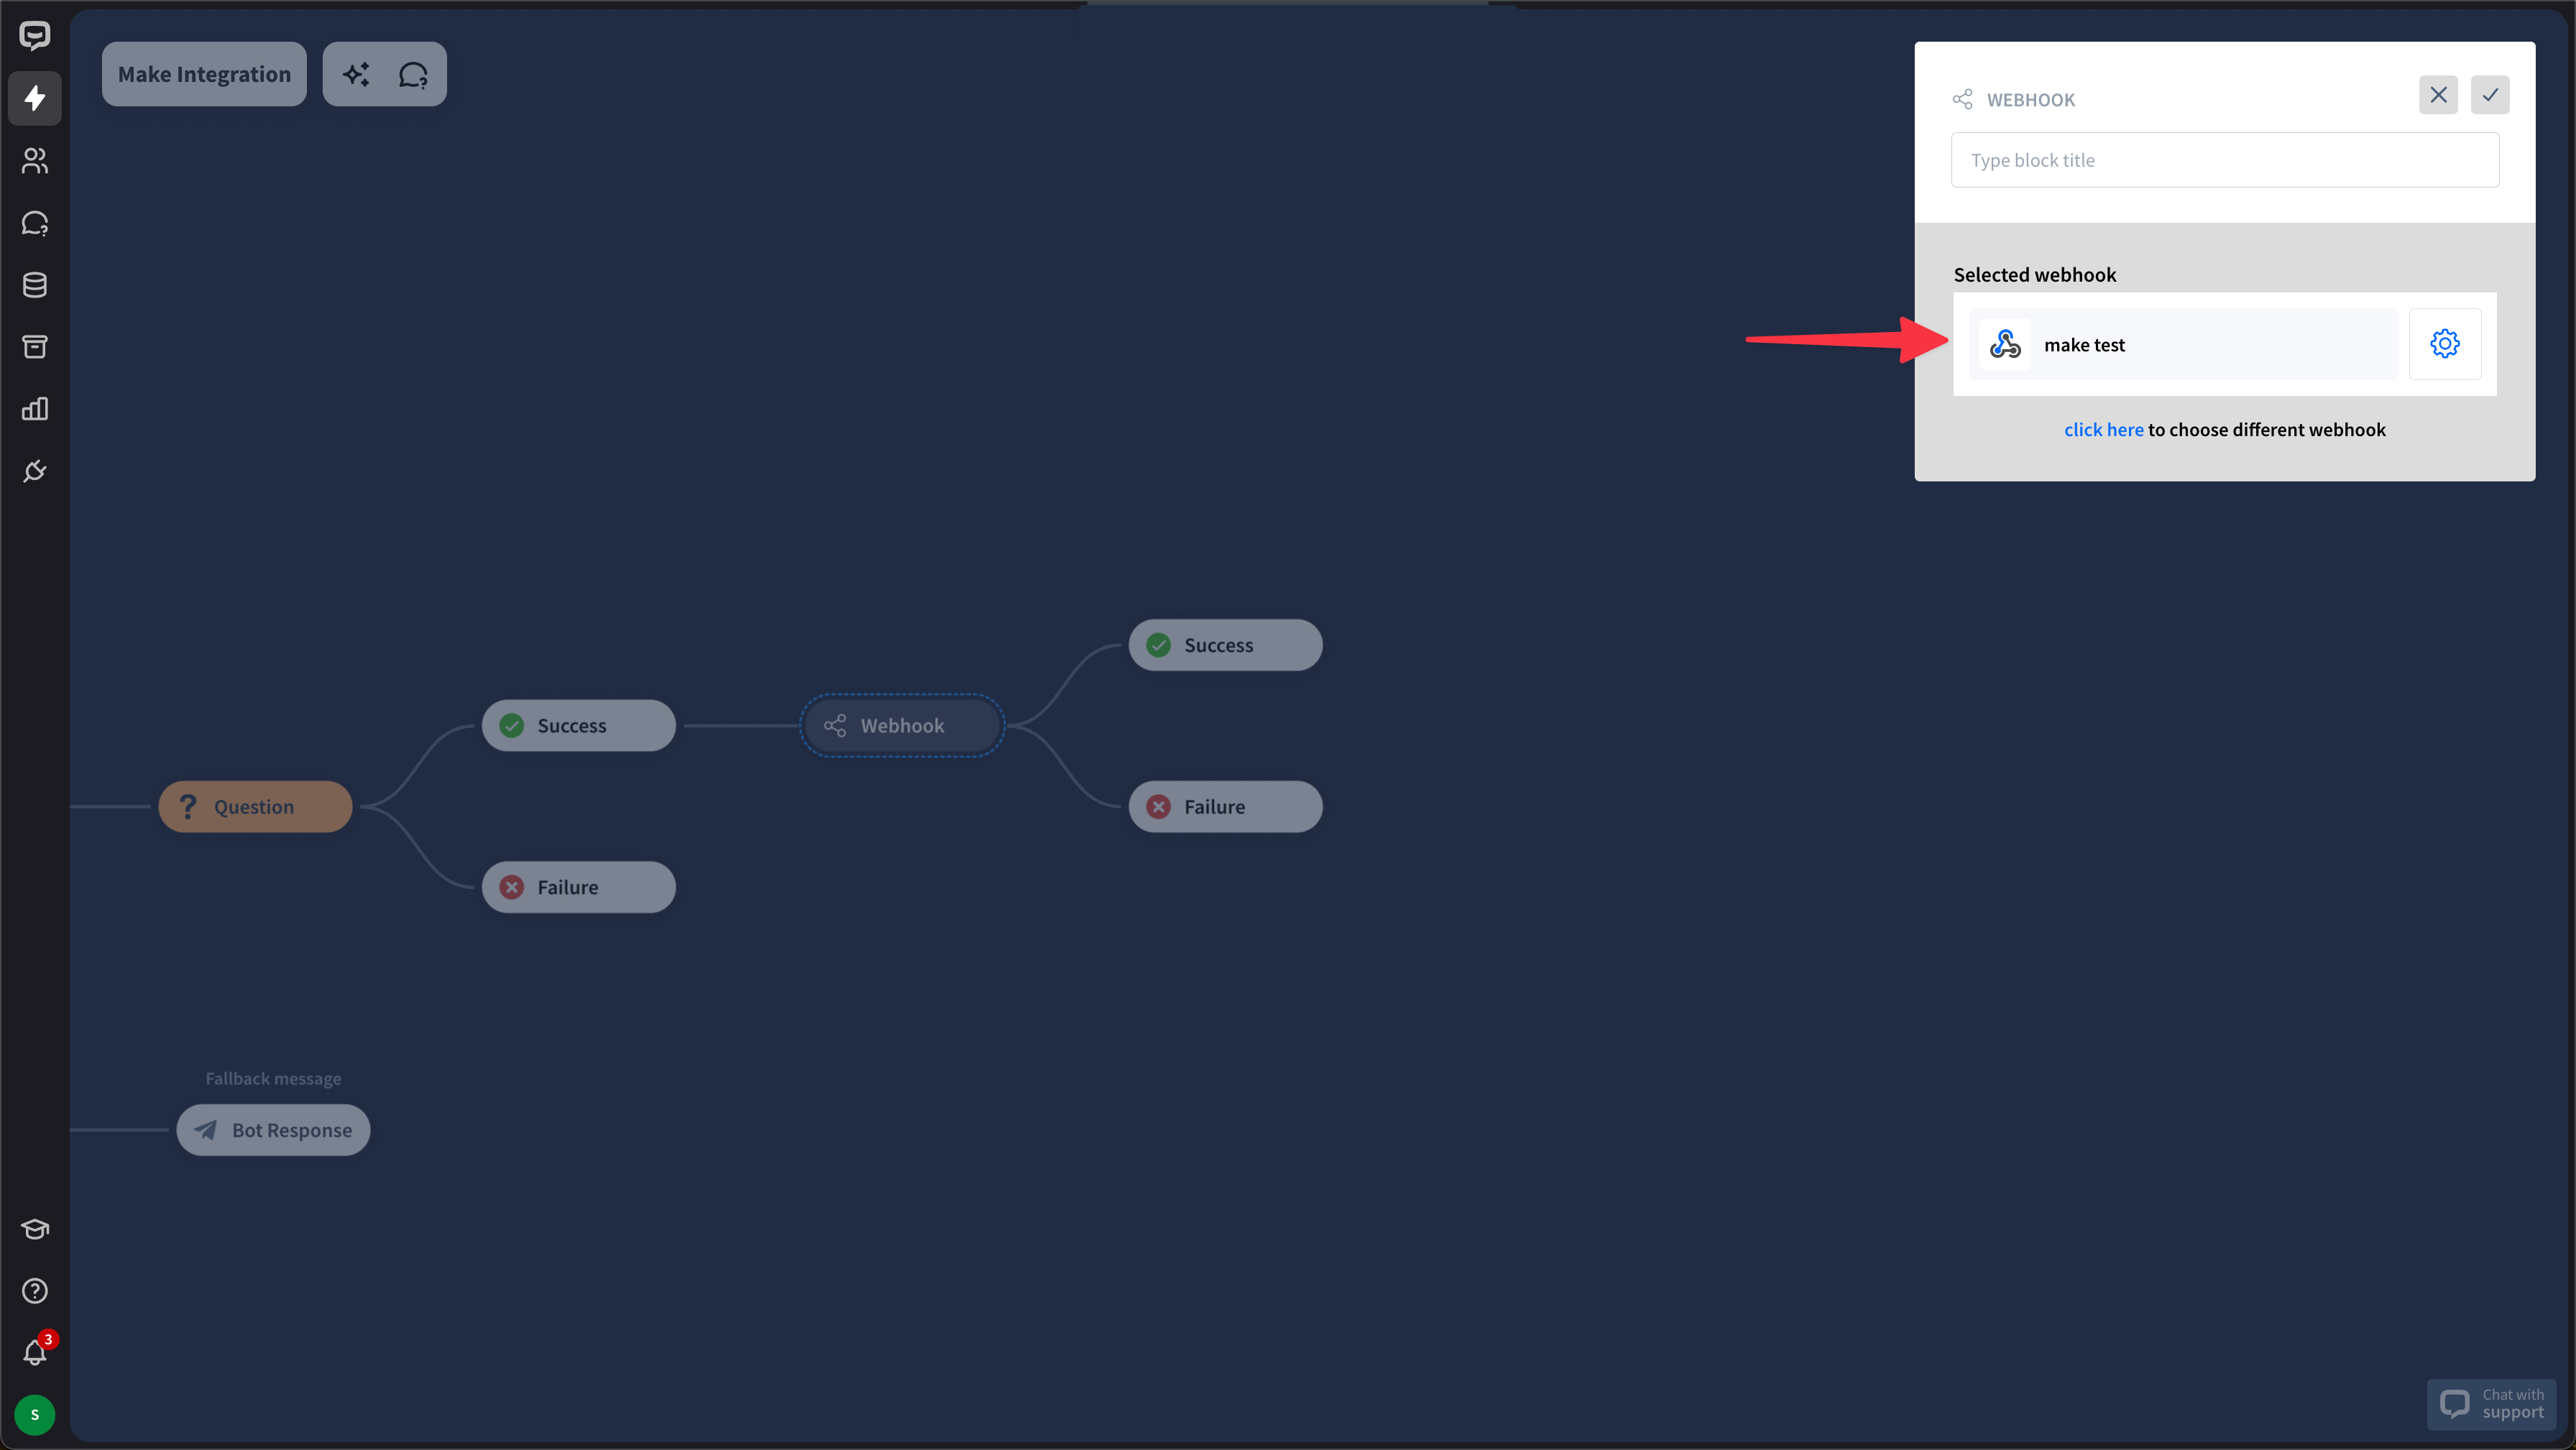
-
Add another module in Make. In the next step, choose Webhooks and the Webhook response.
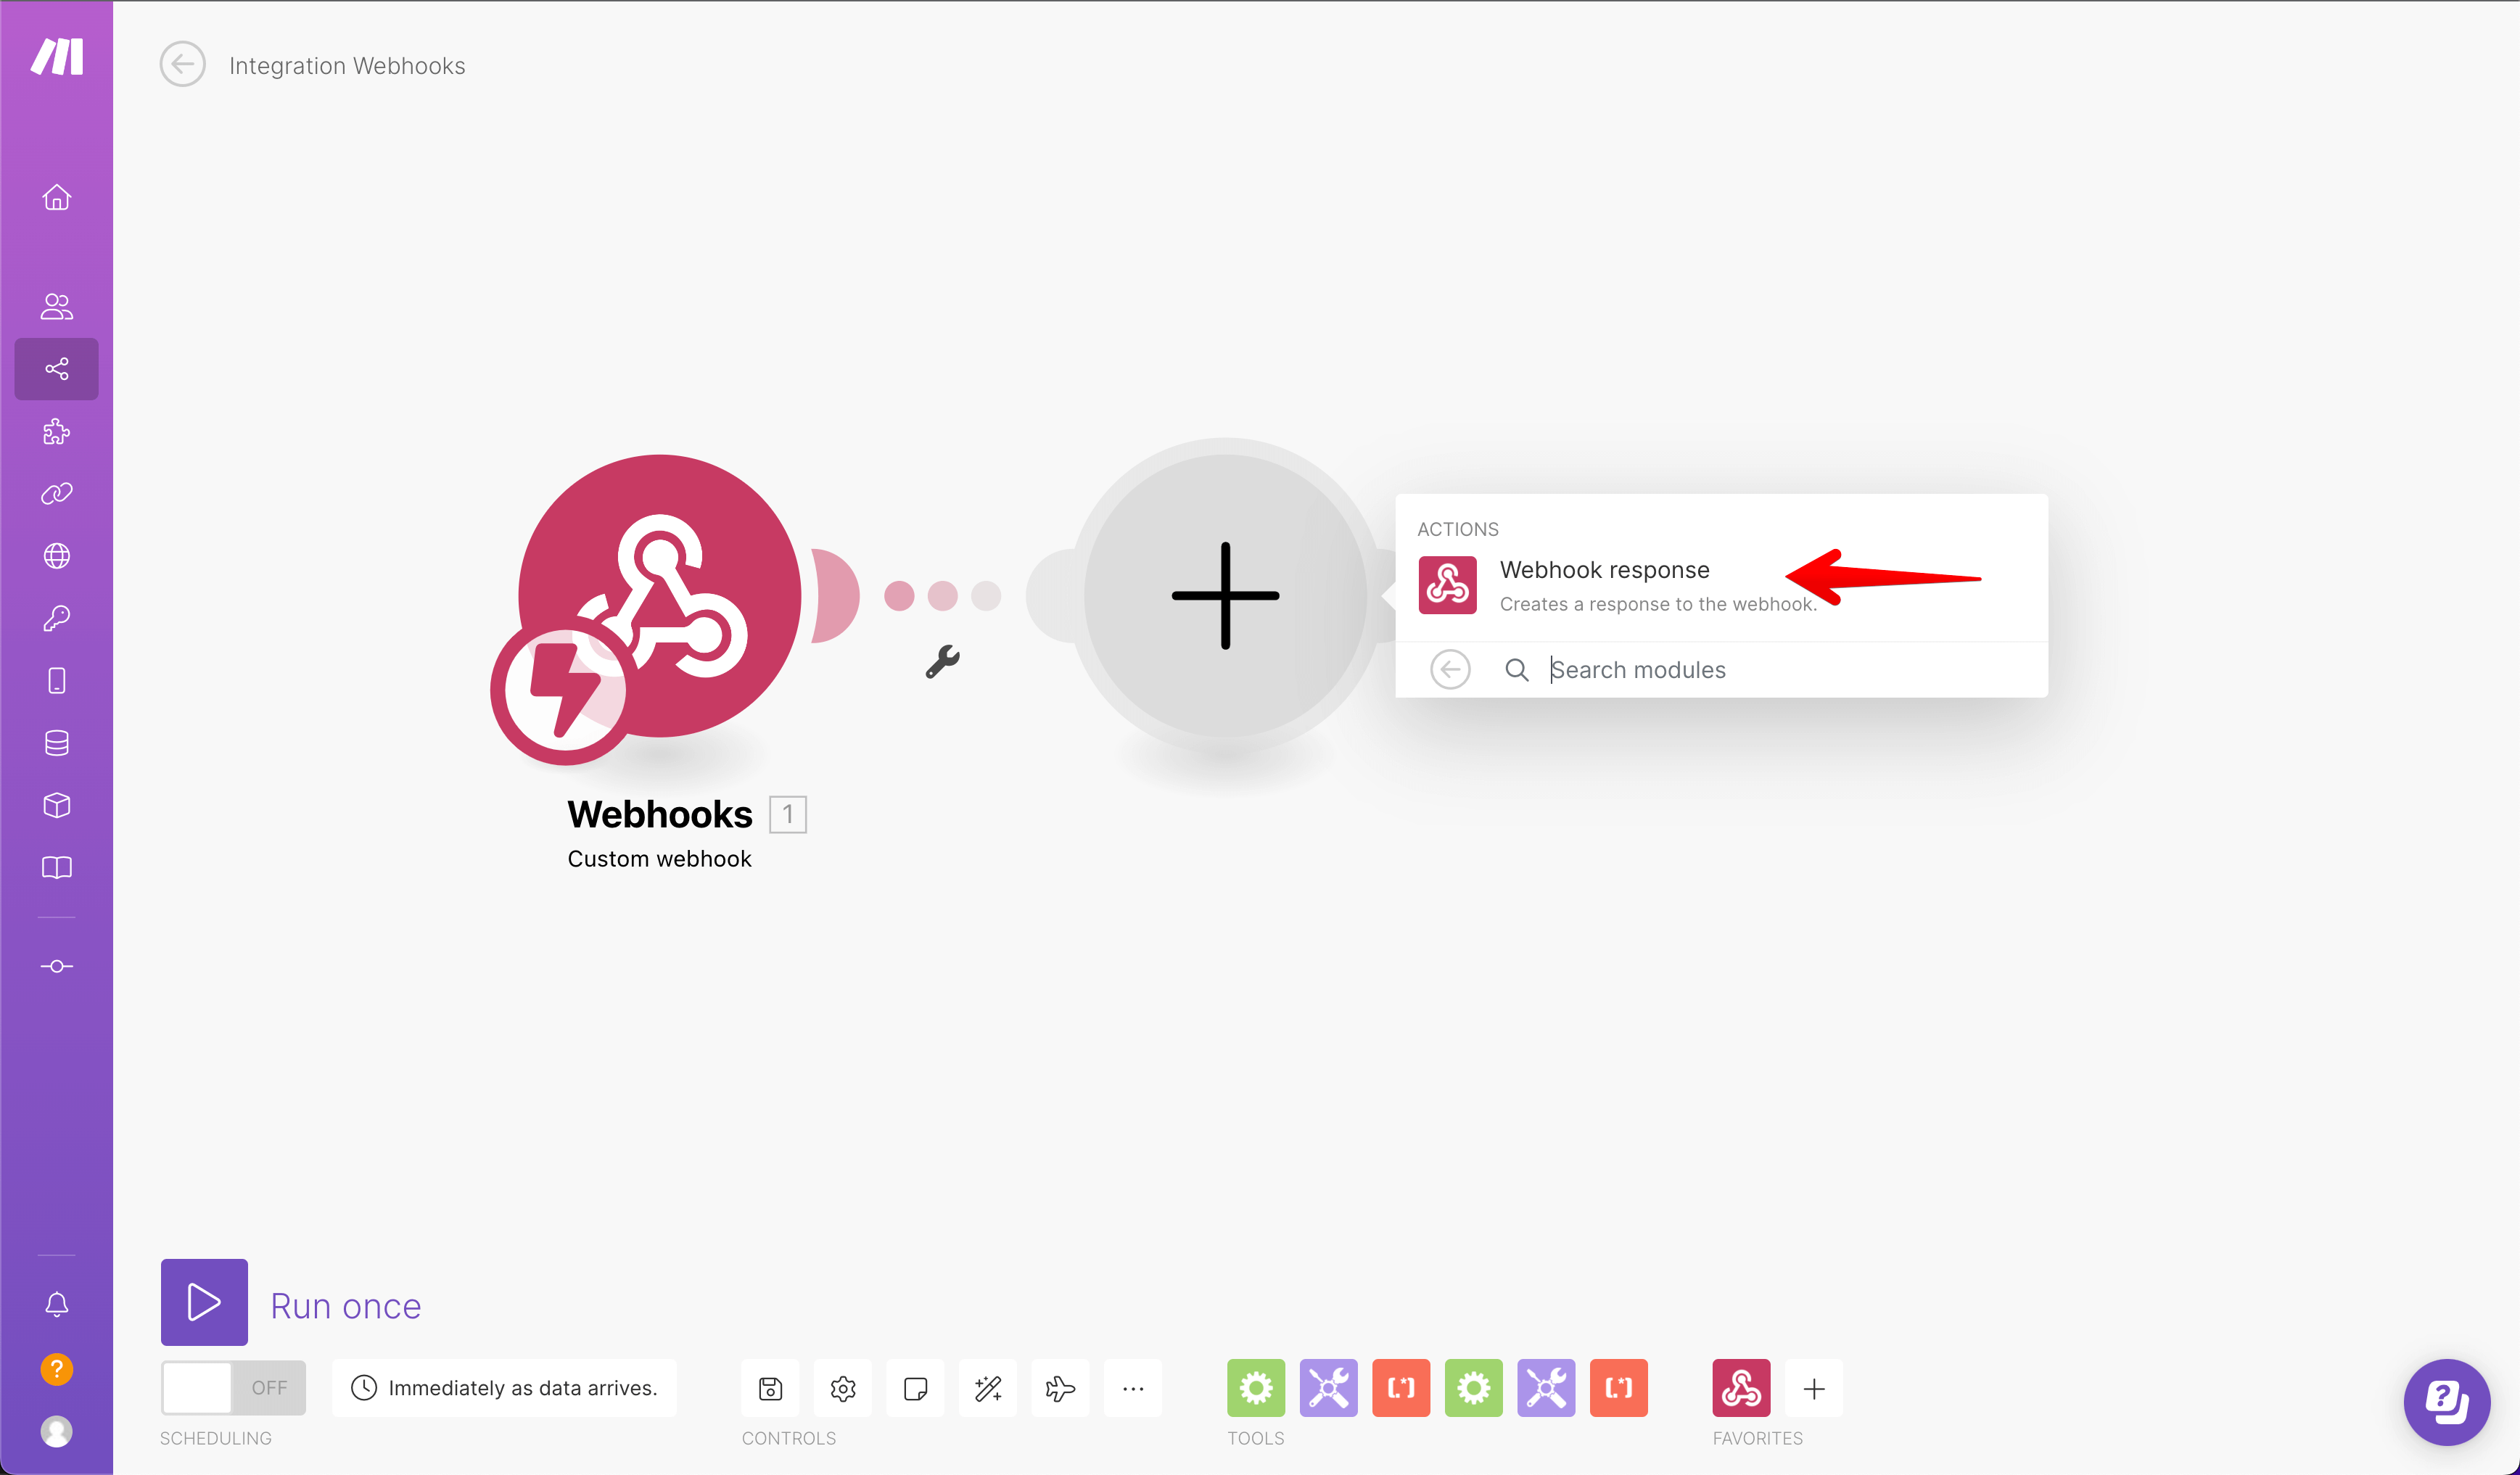
-
In the Webhook response module, check for Status 200 and provide responses you’d like to return to the chat.
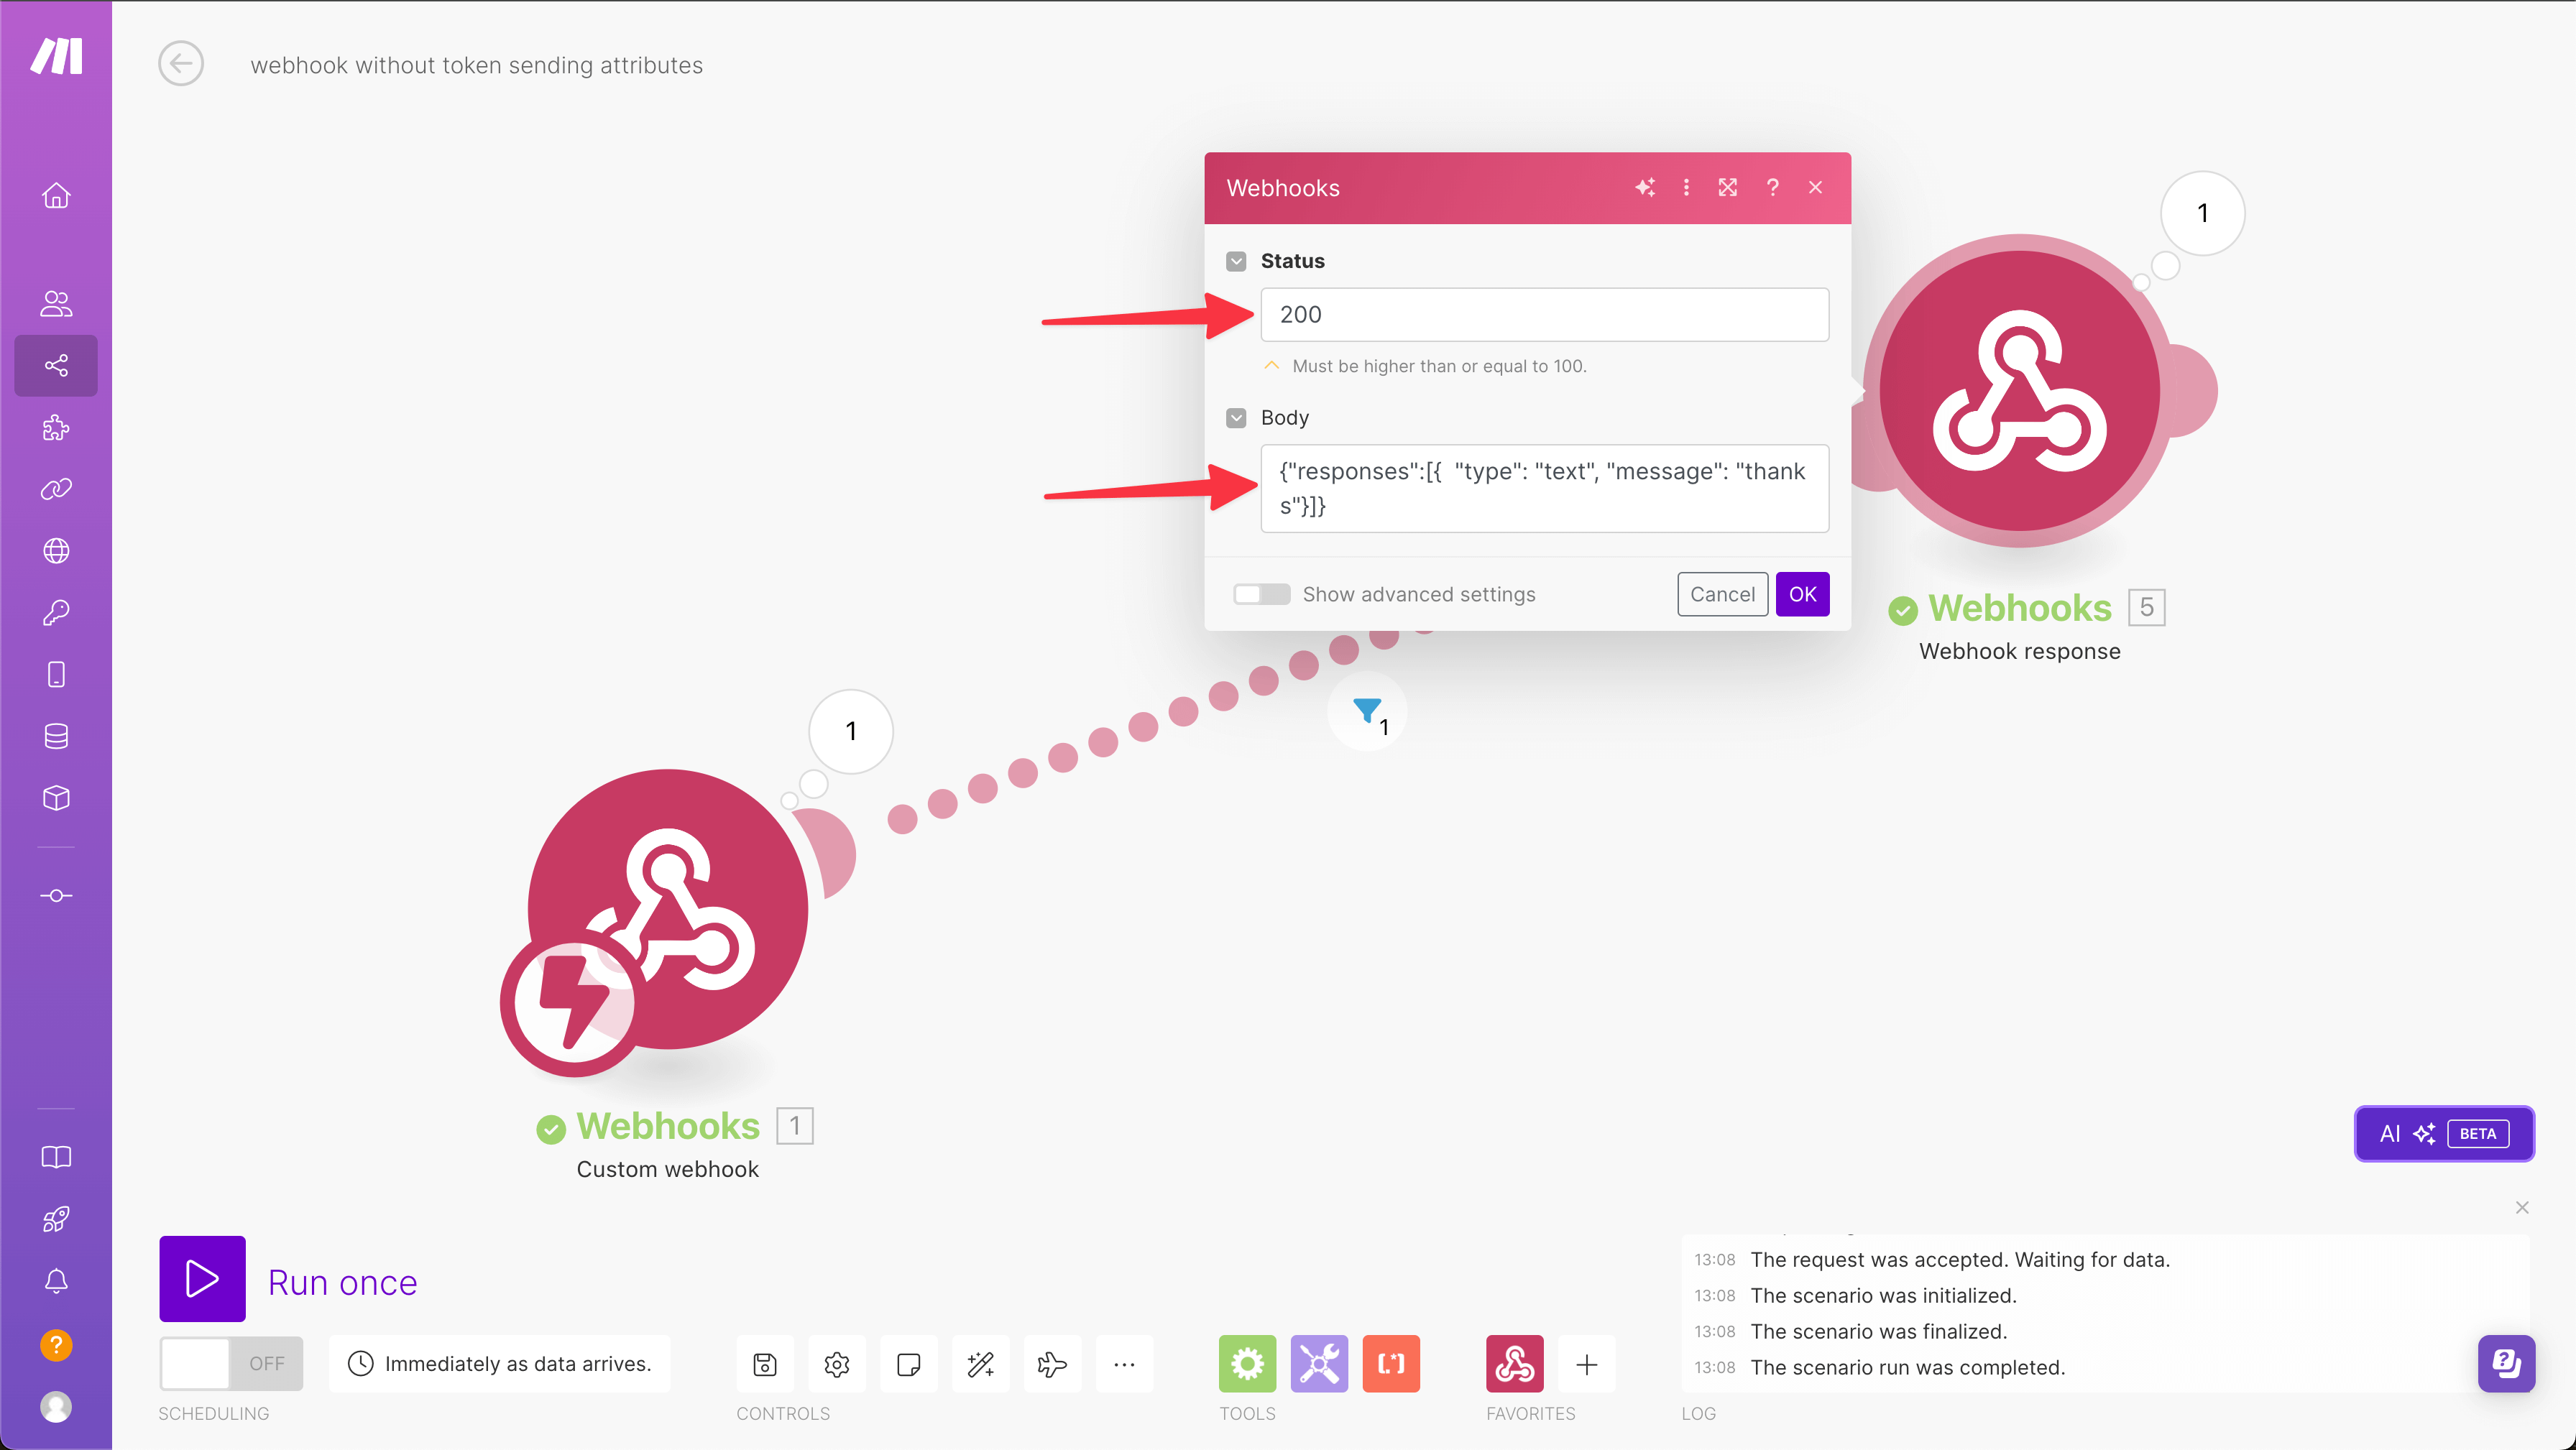
All the available bot responses and the correct syntax are available to check in the API documentation.In the example above, you can see the text response with the following code:
{"responses":[{ "type": "text", "message": "thanks"}]}-
Click the line between the two modules. Provide the conditions on which the message will be returned to the chat.
Choose the Exist condition in the filter for the most basic scenario. You can choose more complicated conditions and change the logic rules for more advanced cases.

-
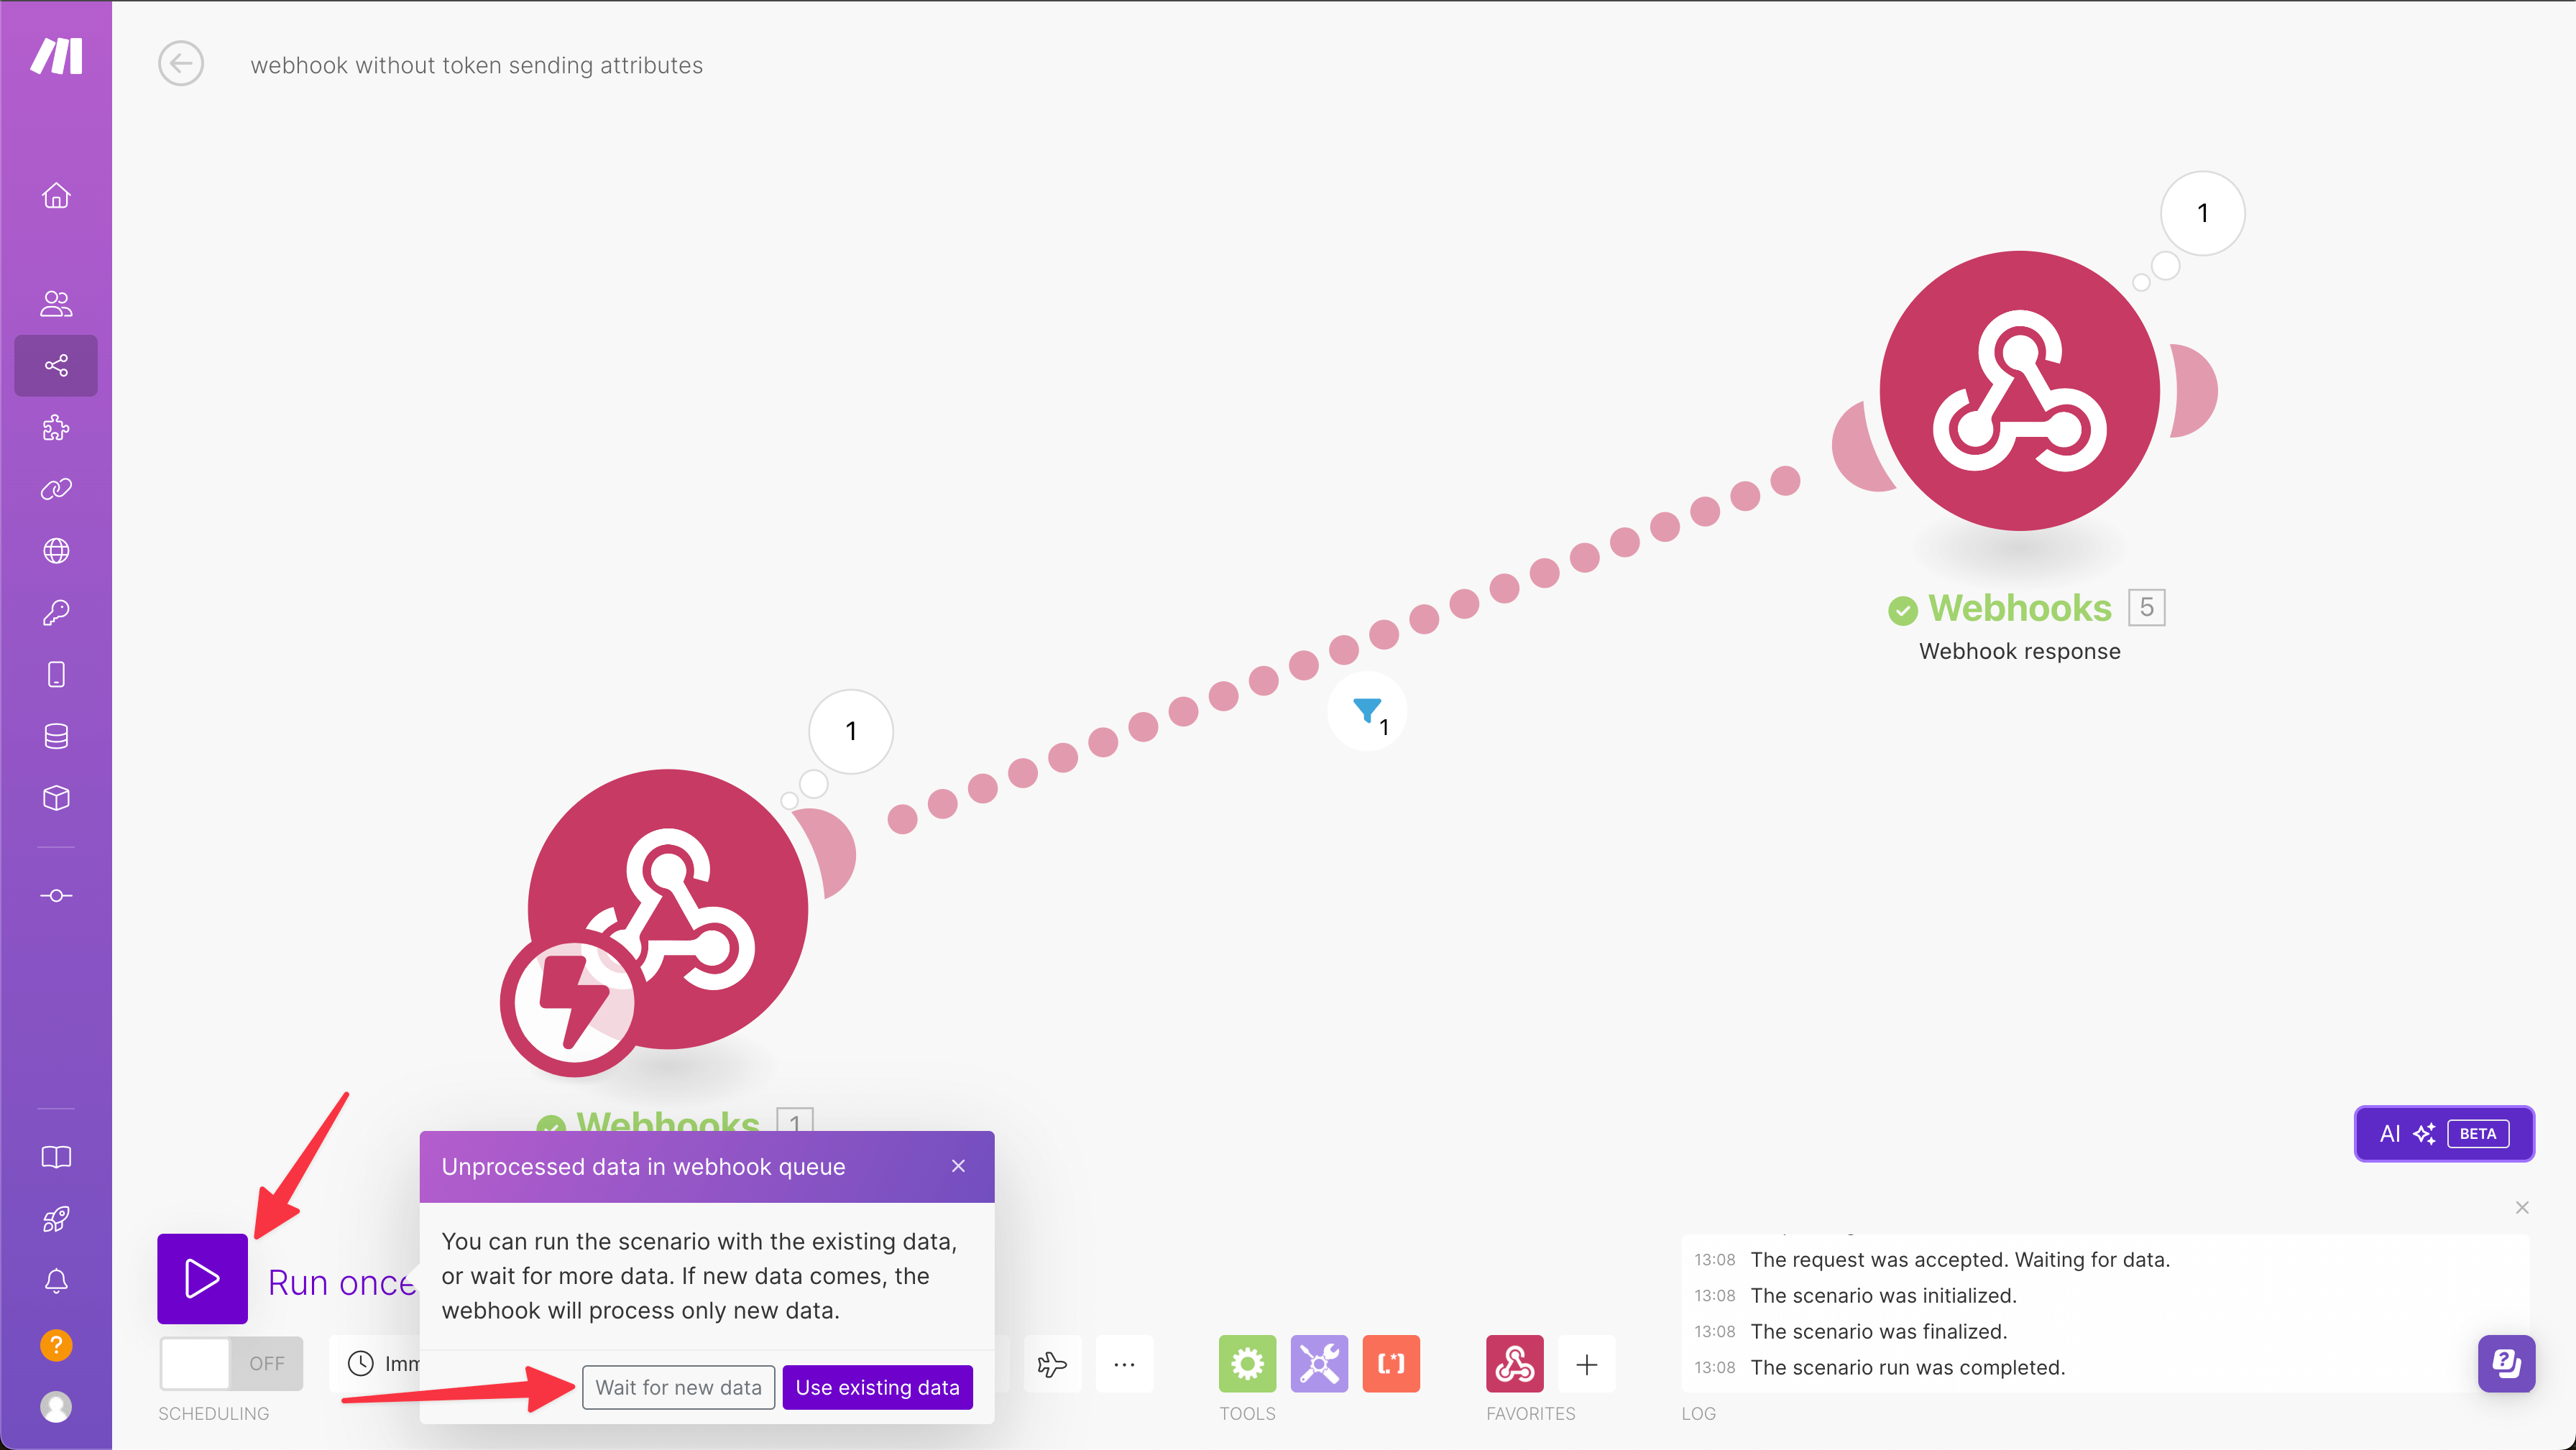
Click the Run once button below the modules in Make. Choose the Wait for new data option.
-
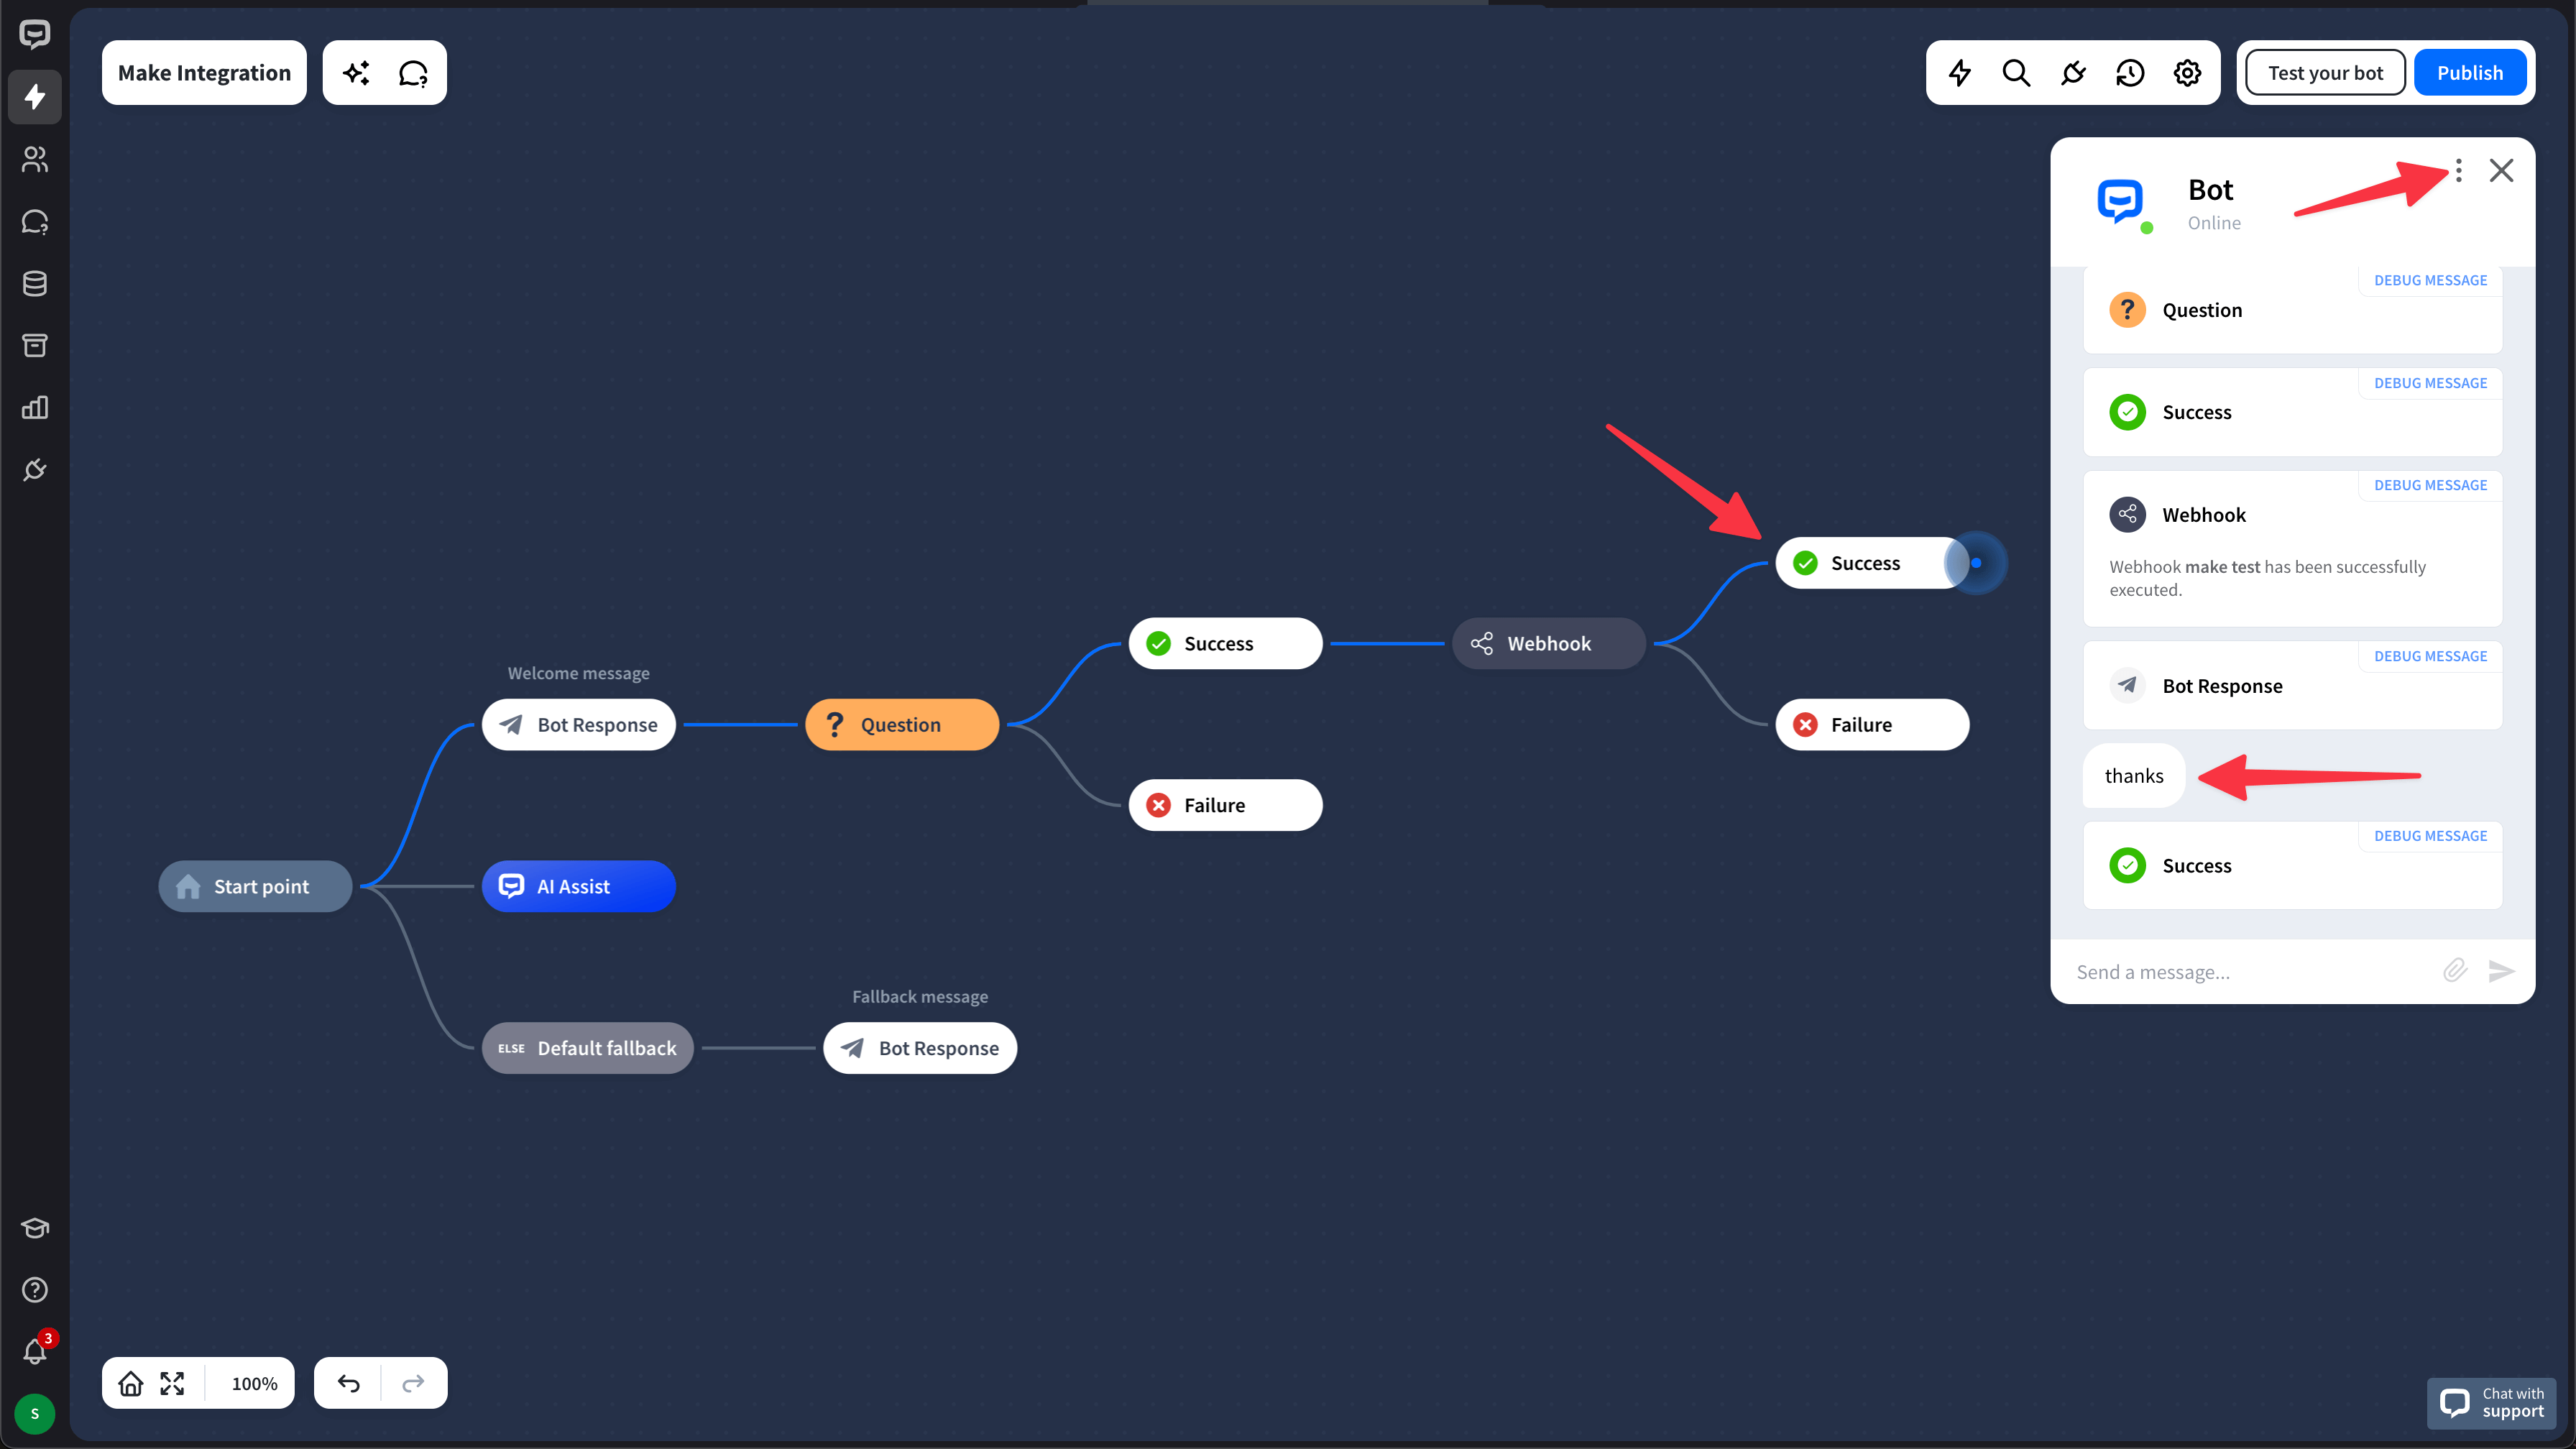
Go to the bot and test the integration in the Testing tool. Remember to trigger the Webhook action during the test chat.
The test was successful and the information was passed when the Webhook block went to the Success block. The message was returned to the chat. You can check the details in the Debug mode.
-
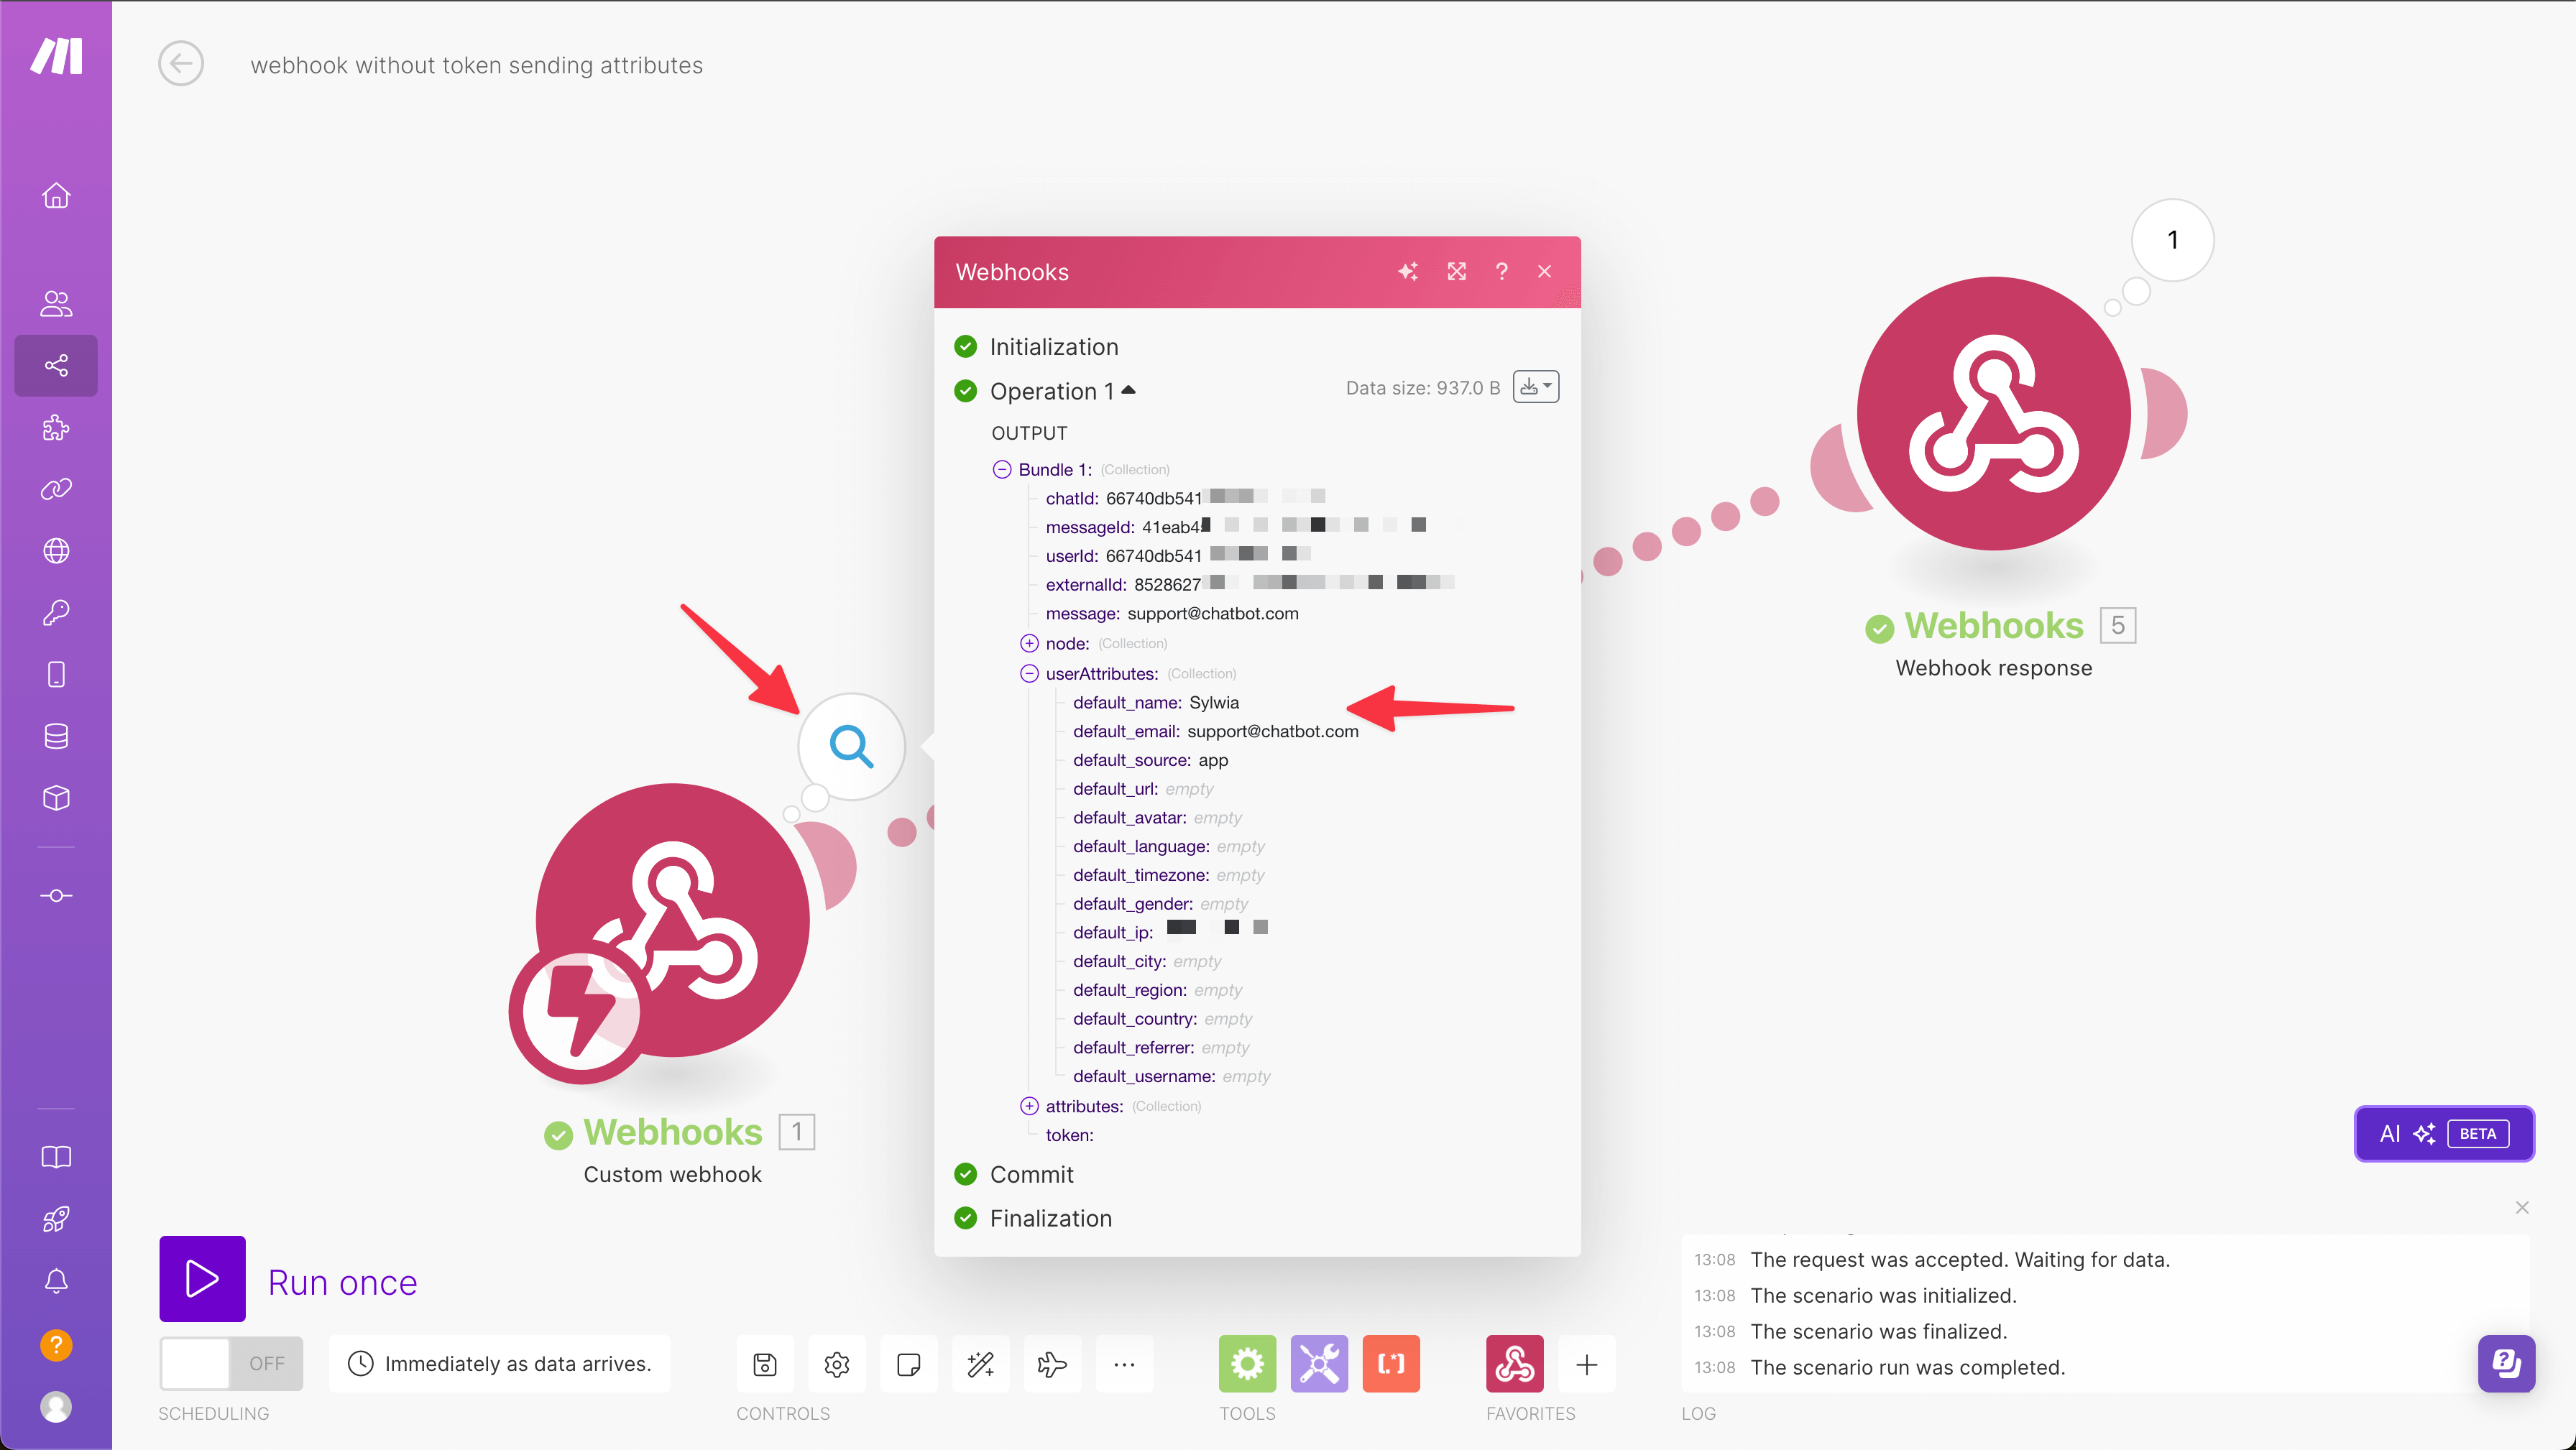
Go back to Make to see the information gathered in the chat.
-
Remember to publish your bot before you install the bot on your site.
Editing the Make webhook
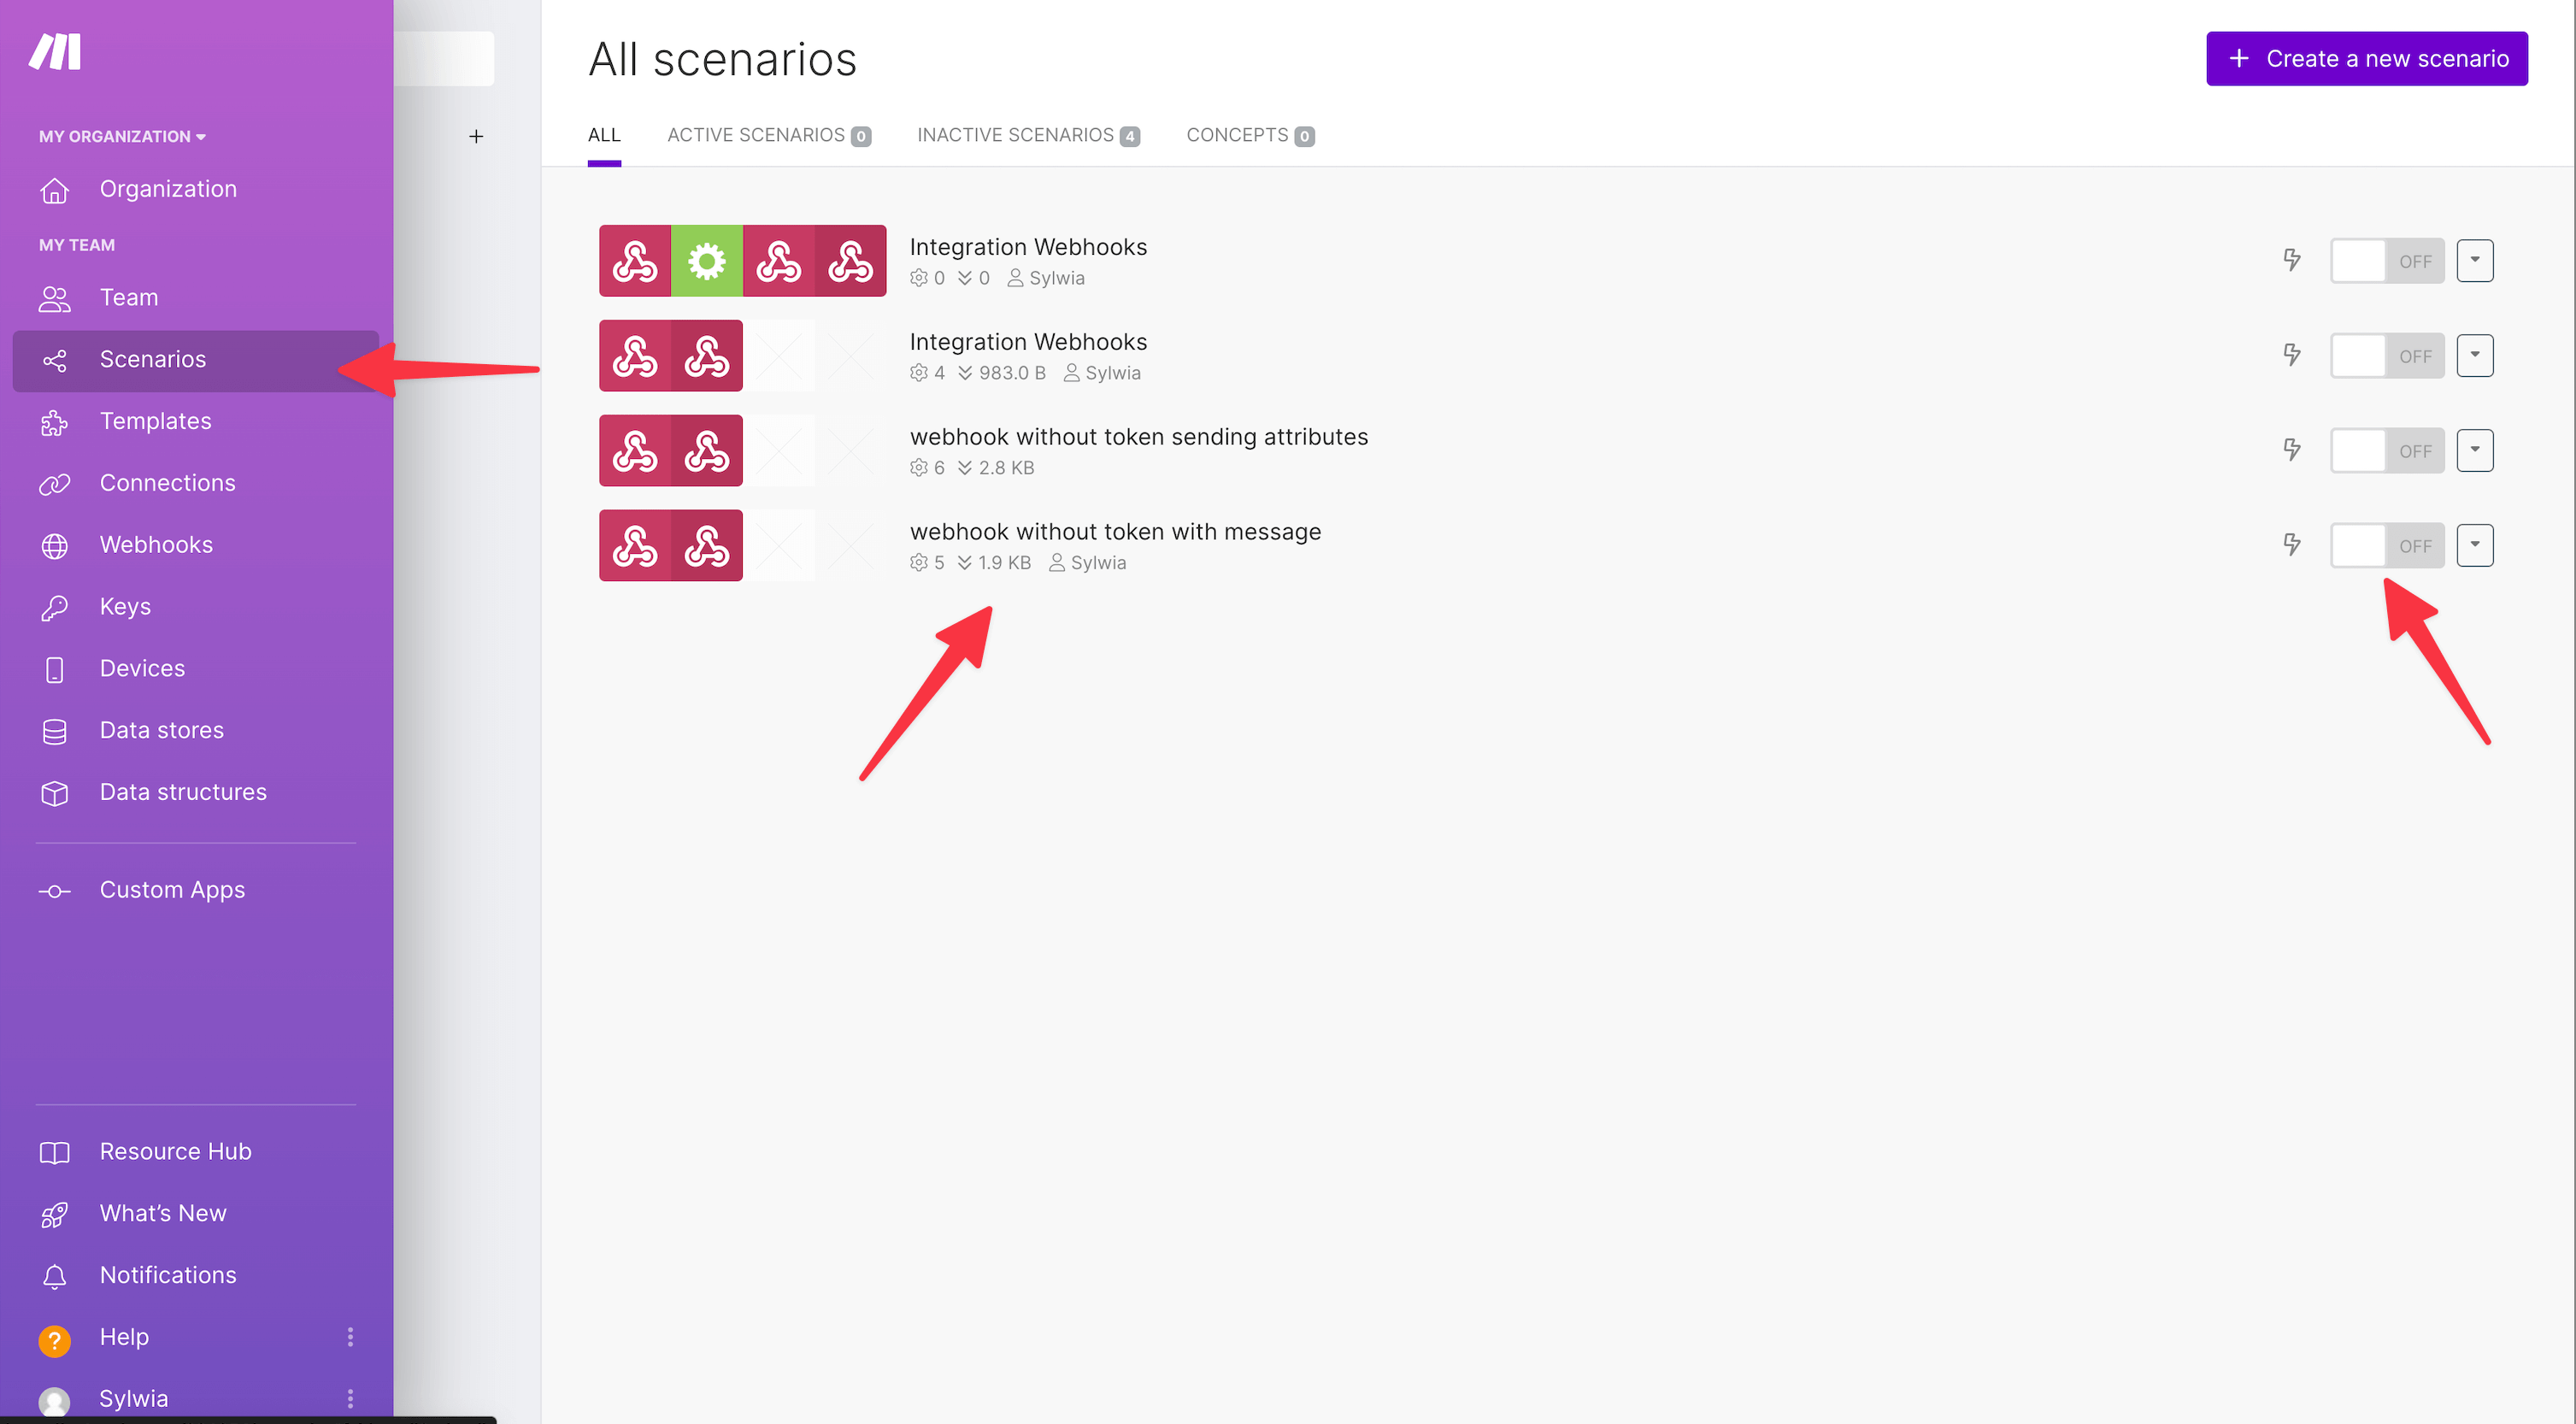
You can edit, disable, or delete the webhook in the Make app. To do so, select Scenarios from the left-side menu, select the correct webhook from the list, and make the necessary changes.
When you delete the webhook in the Make app, it will be disconnected and deleted from the bot. If you delete the webhook from the bot only, it will stay in the Make app.
Read more:
